or Call Us at 1-800-776-2228
or Call Us at 1-800-776-2228
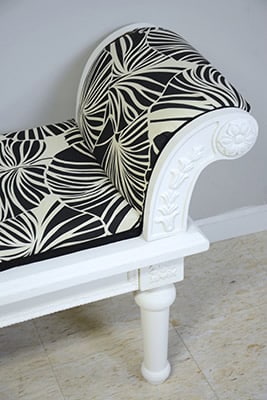
I had been wanting to reupholster this bench for nearly four years now. Four. But, I had been the victim of "unfinished-itis." You know, that debilitating condition that happens to do-it-yourselfers when you start a project, but some virus starts eating away at your resolve to finish. Before you know it, the project is collecting dust in some musty corner of your basement.
Well, that's what happened with this estate sale bench I lugged home years ago. Lost leg bolts, broken bench arms, and DIY distraction prevented me from adding this potential piece of furniture to my collection. Until today, that is. I can't believe it turned out so pretty!
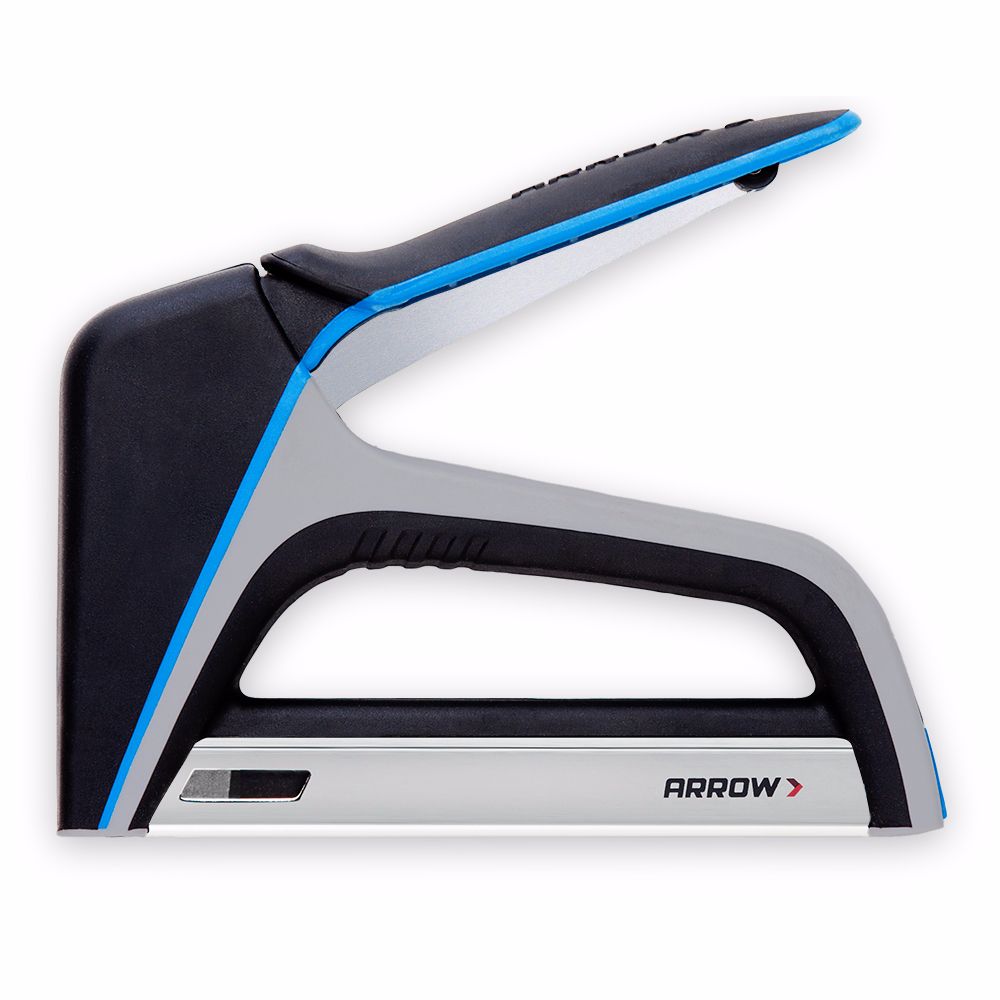
TacMate™ Heavy-Duty Staple Gun
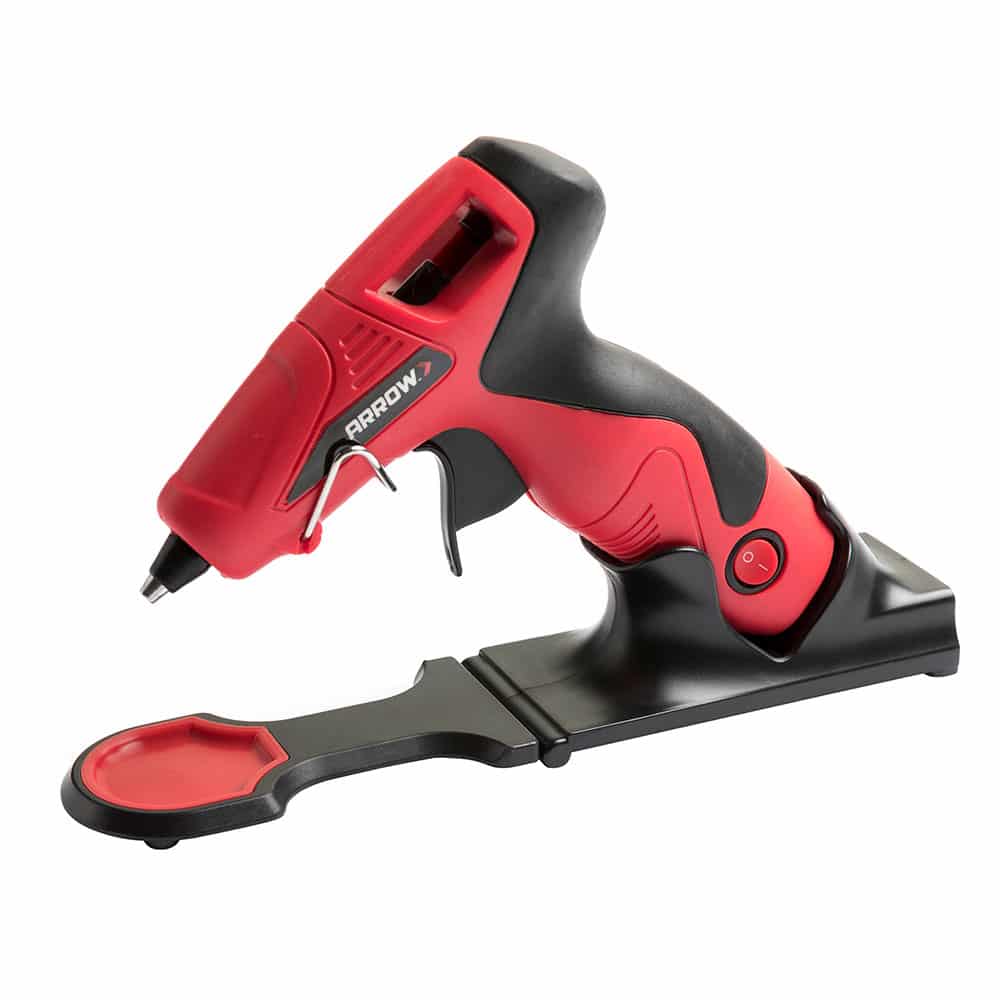
MiniPlus™ Glue Gun

Removing the old fabric is probably the most intimidating part when you upholster a bench or another piece of furniture. Sometimes you’re just not sure where to start. For this bench makeover, the starting point was removing the decorative trim that was hot glued over the staples to hide them.
Next, I used my Arrow Fastener staple lifter and some pliers to pull the staples out of the MDF boards, which were glued together to make up the upholstered bench arms. It’s always interesting when you remove the fabric and padding on upholstered furniture and see what’s really underneath. It’s just pieces of old wood and boards. The whole “smoke and mirrors” illusion doesn’t seem so tricky, after all.
I love saving the old pieces of fabric to use as a new pattern. You don’t have to do this, but personally, I think it makes things much more “no-brainer” than having to figure it out for yourself. It’s still good to measure so you’ll know the measurements, but with the pattern, it takes the whole guess-work out of it. When I was done laying out and cutting new pieces of fabric (which were actually old pieces I had laying around the house), I had two large pieces and two smaller pieces for the upholstered bench arm coverings.
I love saving the old pieces of fabric to use as a new pattern. You don’t have to do this, but personally, I think it makes things much more “no-brainer” than having to figure it out for yourself. It’s still good to measure so you’ll know the measurements, but with the pattern, it takes the whole guess-work out of it. When I was done laying out and cutting new pieces of fabric (which were actually old pieces I had laying around the house), I had two large pieces and two smaller pieces for the upholstered bench arm coverings.
You don’t have to paint a bench before upholstering it. But this one needed a pick-me-up. It had an ugly plastic coating over MDF boards, so I felt no qualms whatsoever about slapping paint on it. (Be sure to use two coats).
You don’t have to paint a bench before upholstering it. But this one needed a pick-me-up. It had an ugly plastic coating over MDF boards, so I felt no qualms whatsoever about slapping paint on it. (Be sure to use two coats).
While the paint was drying, I draped fabric over the seat of the bench and trimmed it to fit. Next, I used my Arrow Fastener T50X TacMate to secure the fabric as close to the edge as possible.
While the paint was drying, I draped fabric over the seat of the bench and trimmed it to fit. Next, I used my Arrow Fastener T50X TacMate to secure the fabric as close to the edge as possible.
Once secured in place, I used my scissors to trim the excess fabric and folded in the corners of the upholstered bench. At this point, the edge where the staples were placed was ready to be hidden with hot glue and bias tape that I used as “decorative trim” since I didn’t have any other options. But I think the black bias tape worked really well!
Once secured in place, I used my scissors to trim the excess fabric and folded in the corners of the upholstered bench. At this point, the edge where the staples were placed was ready to be hidden with hot glue and bias tape that I used as “decorative trim” since I didn’t have any other options. But I think the black bias tape worked really well!
Now that the bench was upholstered, it was time to tackle the bench arms. Starting on the underside of the arm, I folded the fabric in and used the T50X TacMate to secure the fabric to the MDF “wood.” I tucked the fabric up underneath the roll, stapled, and added another piece of fabric to cover the rest of the upholstered bench arm. Around the edges, I folded the fabric so that it would fit.
Now that the bench was upholstered, it was time to tackle the bench arms. Starting on the underside of the arm, I folded the fabric in and used the T50X TacMate to secure the fabric to the MDF “wood.” I tucked the fabric up underneath the roll, stapled, and added another piece of fabric to cover the rest of the upholstered bench arm. Around the edges, I folded the fabric so that it would fit.
To cover the upholstered bench staples, you’ll need to cover the staples with something decorative. I just used bias tape because I had some on hand, but it actually worked out perfectly well! It complimented the fabric nicely. Be super careful with hot glue!
To cover the upholstered bench staples, you’ll need to cover the staples with something decorative. I just used bias tape because I had some on hand, but it actually worked out perfectly well! It complimented the fabric nicely. Be super careful with hot glue!
The last step is to attach the legs back onto the bench. I’ll likely need to go back and add wax or a topcoat to help protect the paint. But for now, it’s a wrap — this project is 99% done.
The last step is to attach the legs back onto the bench. I’ll likely need to go back and add wax or a topcoat to help protect the paint. But for now, it’s a wrap — this project is 99% done.
Here’s another quick look at what it looked like when I bought it from the estate sale four years ago and what it looks like now. So what do you think?! Isn't it super cute?
Get Arrow tips, tricks, projects and promos in your inbox!
Hey there! We’ve updated our Privacy and Cookie Policies at the request of some of our friends in Europe. Click Accept to let us know you’re okay with the updates. Thanks!
View Cookie Policy Accept