or Call Us at 1-800-776-2228
or Call Us at 1-800-776-2228
Time to change the carpet in the living room! Our carpet was several years old and starting to show a significant amount of wear. We visited our local flooring center, picked a beautiful new carpet for the room and scheduled a day to have it installed. The cost was within our budget so we were hoping for no surprises. Unfortunately, when the installers removed the carpet and padding, they discovered some flooring damage. Our residential subfloor had to be replaced, and the cost to repair was a budget buster! See how we repaired the subfloor with the Arrow PT15G Pneumatic Angled Nailer to minimize the unexpected cost.
Don't forget to grab a pair of safety goggles and gloves (optional) before getting started! State, local & municipal codes vary depending upon your location so please check before proceeding with your residential repair.

Pneumatic Angled Nailer

The carpet installers removed the baseboard, carpet, padding and tackstrip when they discovered the damage to the subfloor. Since we decided to perform the subfloor repair ourselves, we rescheduled the installation of the new carpet. This type of damaged subfloor (OSB/flakeboard) will not respond well with a liquid sealer. The subfloor was compromised, and the damaged area had to be replaced.
The carpet installers removed the baseboard, carpet, padding and tackstrip when they discovered the damage to the subfloor. Since we decided to perform the subfloor repair ourselves, we rescheduled the installation of the new carpet. This type of damaged subfloor (OSB/flakeboard) will not respond well with a liquid sealer. The subfloor was compromised, and the damaged area had to be replaced.
The subfloor is attached to the floor joists below, which are typically set 16” apart on center. We were fortunate that the damaged subfloor was located on the first floor of our home, and that our basement ceiling was exposed so we could view the area we would be replacing (see first photo below). Typically the joist will be made from 2×8 lumber. Mark the location of the joist’s center, measure 16”, and mark the center of the next joist. Make several marks along the subfloor and use a straight edge to draw lines where you will need to cut. ARROW TIP: Use a stud finder to locate the joist closest to the damage, and also to confirm the accuracy of your measurements.
The subfloor is attached to the floor joists below, which are typically set 16” apart on center. We were fortunate that the damaged subfloor was located on the first floor of our home, and that our basement ceiling was exposed so we could view the area we would be replacing (see first photo below). Typically the joist will be made from 2×8 lumber. Mark the location of the joist’s center, measure 16”, and mark the center of the next joist. Make several marks along the subfloor and use a straight edge to draw lines where you will need to cut. ARROW TIP: Use a stud finder to locate the joist closest to the damage, and also to confirm the accuracy of your measurements.
To prevent cutting into the floor joist, set the blade depth on the circular saw before getting started. Most subfloors are 3/4” thick, so loosen the adjustment lever on the saw, set the proper depth and retighten. ARROW SAFETY TIP: Remove the battery or unplug the electrical cord for this step.
To prevent cutting into the floor joist, set the blade depth on the circular saw before getting started. Most subfloors are 3/4” thick, so loosen the adjustment lever on the saw, set the proper depth and retighten. ARROW SAFETY TIP: Remove the battery or unplug the electrical cord for this step.
Cut along the marked line until you’ve cut out the total area that needs to be replaced. ARROW TIP: Be cautious when cutting, as there will most likely be nails from the initial subfloor install. Cut to the inside of any nails so they will remain with the section of subfloor that will not be removed.
Cut along the marked line until you’ve cut out the total area that needs to be replaced. ARROW TIP: Be cautious when cutting, as there will most likely be nails from the initial subfloor install. Cut to the inside of any nails so they will remain with the section of subfloor that will not be removed.
Using the pry bar, carefully remove the damaged section of subfloor. ARROW SAFETY TIP: After removal of the damaged section, you will be looking at the ceiling of the floor below or the room below if the joists are exposed, such as in a basement. Be careful not to step into this area as you could damage the ceiling below or fall through the opening.
Using the pry bar, carefully remove the damaged section of subfloor. ARROW SAFETY TIP: After removal of the damaged section, you will be looking at the ceiling of the floor below or the room below if the joists are exposed, such as in a basement. Be careful not to step into this area as you could damage the ceiling below or fall through the opening.
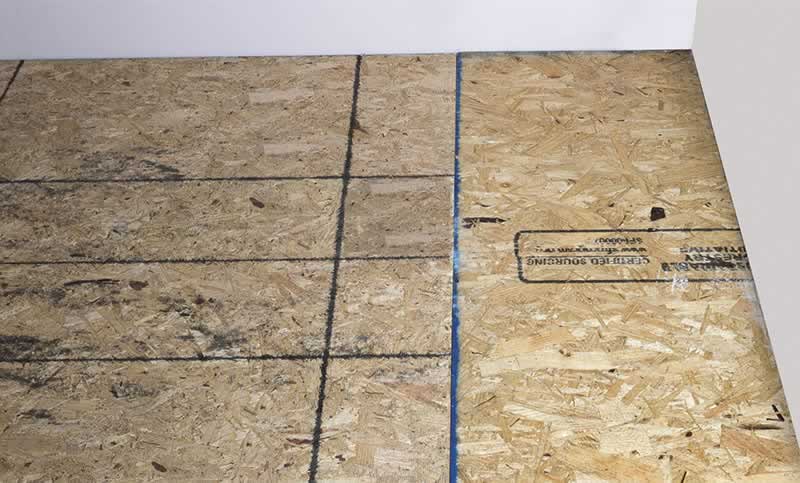
The plywood or OSB to replace the subfloor is sold in 4’ x 8’ sheets, so we had to cut a 4’ x 16” section from our new subfloor. Cut the board per your measurements, and lay into place on top of the joists for an accurate fit.
The plywood or OSB to replace the subfloor is sold in 4’ x 8’ sheets, so we had to cut a 4’ x 16” section from our new subfloor. Cut the board per your measurements, and lay into place on top of the joists for an accurate fit.
Attach the new subfloor with the Arrow PT15G Angled Nailer and Arrow 15G64-1K Angled Nails. Place a nail every 6-8 inches along the joist. If your new section is large enough to cover multiple joists, use the stud finder to locate the joists to ensure each nail goes into a joist. ARROW TIP: If you are replacing a large section of subfloor you might want to add construction glue to the joists to help prevent a squeaky floor.
Attach the new subfloor with the Arrow PT15G Angled Nailer and Arrow 15G64-1K Angled Nails. Place a nail every 6-8 inches along the joist. If your new section is large enough to cover multiple joists, use the stud finder to locate the joists to ensure each nail goes into a joist. ARROW TIP: If you are replacing a large section of subfloor you might want to add construction glue to the joists to help prevent a squeaky floor.
Your repaired subfloor is now ready for the flooring center to complete the carpet install.
Your repaired subfloor is now ready for the flooring center to complete the carpet install.
We’d love to see how your damaged subfloor repair project turned out! Share your project pictures on Facebook, Instagram or Twitter by using #MadeWithArrow or tagging Arrow Fastener.
Get Arrow tips, tricks, projects and promos in your inbox!
Hey there! We’ve updated our Privacy and Cookie Policies at the request of some of our friends in Europe. Click Accept to let us know you’re okay with the updates. Thanks!
View Cookie Policy Accept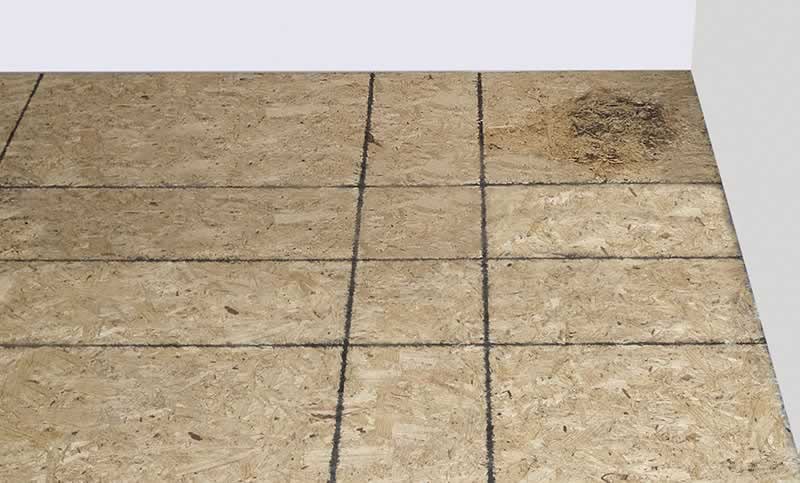