or Call Us at 1-800-776-2228
or Call Us at 1-800-776-2228
This year, I’ve made my own garden planters, which left me waving my DIY gardener flag in pride. I’ve never been much of a gardener because much of what I try to grow dies. But I’ve become fascinated with making pretty DIY pots and planters. Even if I can’t make what’s inside the garden pots and planters stay alive, I can doggone sure have fun creating decorative ways to display them. And I knew the perfect project: DIY garden planters made from decorative metal sheeting!
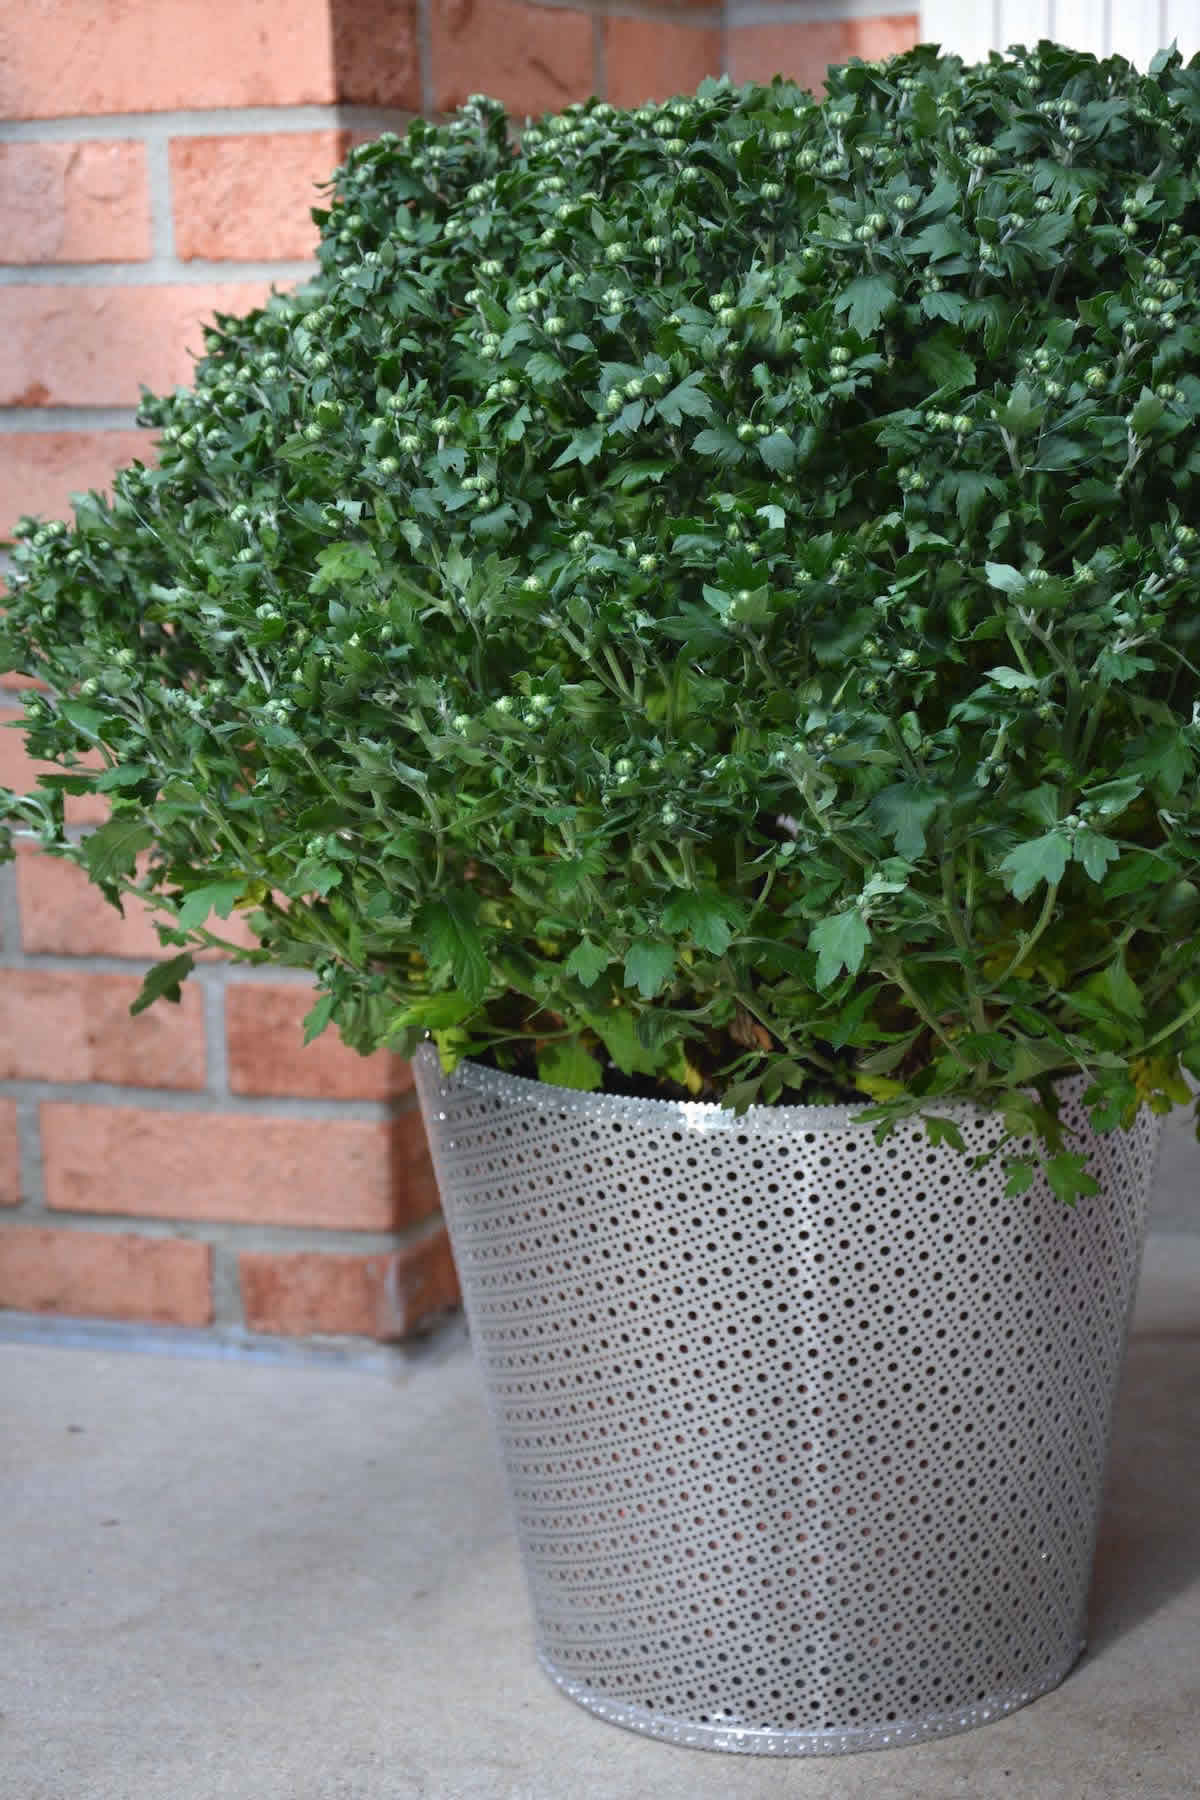
Sheet metal with holes + rivets = awesome metal DIY garden planters!
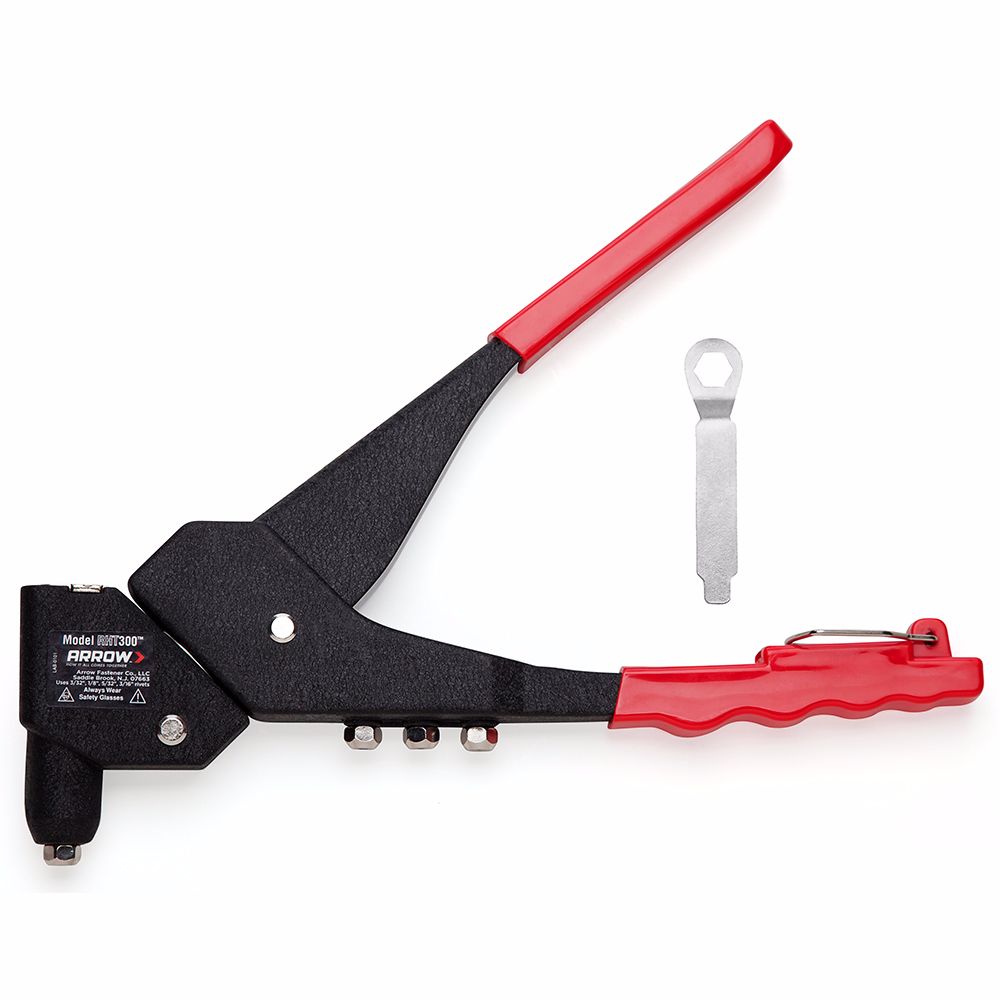
Swivel Head Rivet Tool
Create the garden planter template. Whenever you’ve got a cylinder-shaped planter for which you want to make a decorative cover, you’ve got to first make a template of it.
Simply lay the garden pot down at a starting point (be sure to mark the bottom of your pot so you know where the starting mark is). Use a marker to carefully trace along the path of the garden pot as you roll it until reaching the starting mark on the bottom of the paper. Do the same for the top of the pot.
When done, you’ll have curved templates. (Tip: Smaller pots will have smaller templates; bigger pots, bigger templates. Keep that in mind when choosing materials for the decorative garden pot covers). After I cut it out, I wrapped it around the garden mum pot to make sure it would fit. It was a perfect fit!
Trace out and cut the aluminum sheet metal. Be careful when cutting metal. That stuff gets sharp! I walked away from this project with a few cuts before I got smart and realized I should be wearing thick work gloves. After you’ve done all the cutting, use your P220 grit sandpaper to smooth out the edges of the metal, being careful not to scratch the metal too much.
Trace out and cut the aluminum sheet metal. Be careful when cutting metal. That stuff gets sharp! I walked away from this project with a few cuts before I got smart and realized I should be wearing thick work gloves. After you’ve done all the cutting, use your P220 grit sandpaper to smooth out the edges of the metal, being careful not to scratch the metal too much.
After cutting out the metal garden planter and seeing that it actually fit, I marked where to insert the rivets to create the shape of the planter. The holes won’t line up perfectly, so now is a good time to pull out the power drill and gently drill your own holes where you need. For this project, I used Arrow’s short steel rivets that are 1/8″ thick. They were perfect for this metal! I put rivet washers on the back side to help keep the rivets in place.
Arrow’s RHT300™ Swivel Head Rivet Tool slides down over the rivet stem and, when squeezed, breaks off the long stem, leaving only the rivet in place, holding the metal neatly in place. Love the riveter!
Something about these edges intrigued me. So, instead of just cutting out the metal garden planter and leaving the rest of the metal discarded, I decided to cut right where you see the dotted line in order to make metal “bias” tape.
For those of you who don’t sew, you may not know what in the heck I’m talking about. Let me explain. “Bias tape” in the sewing world is a folded piece of fabric that’s sewed on to cover up a raw edge. It makes raw edges look finished. So that’s what I decided to do with this metal garden planter. In order to bend it, I laid this piece on the edge of a table corner and bent it in half. When the metal bias tape was folded in half, I could cover the raw top and bottom edge so it was more decorative and not quite as sharp. Plus, the extra metal helps to reinforce the top and bottom edges.
In order to attach the metal bias, I had to drill 1/8″ holes to insert the rivets. As you can see here, the holes didn’t necessarily line up when folded on to each other. But it was super easy to drill through to create lined-up 1/8″ holes for the rivets. I inserted the rivet along with a rivet washer on the back, spacing the rivets out every 6” to 8” to hold the bias onto the metal garden planter. I love the finished look!
What’s even cooler is that you can get several different sheets of aluminum metal sheets and mix and match it. I’ve only seen these lincane aluminum sheets in silver, black, and bronze. But if you want a little variety, you can do the bias in another color (Wouldn’t the black look great for Halloween garden planters?)! You could very well spray paint the metal and rivets to be any color you’d like. So you’re not limited to these colors.
Time to insert the plastic garden planter into the metal garden planter. This was the moment of truth! Would it fit? Would it look polished? Are these cool enough? Thankfully, it turned out great.
Time to insert the plastic garden planter into the metal garden planter. This was the moment of truth! Would it fit? Would it look polished? Are these cool enough? Thankfully, it turned out great.
I love these planters! Now that I know how to make these, I can make more and get really fancy-dancy with it. And I love that I can use them indoors or outdoors (the aluminum is rust-resistant).
Get Arrow tips, tricks, projects and promos in your inbox!
Hey there! We’ve updated our Privacy and Cookie Policies at the request of some of our friends in Europe. Click Accept to let us know you’re okay with the updates. Thanks!
View Cookie Policy Accept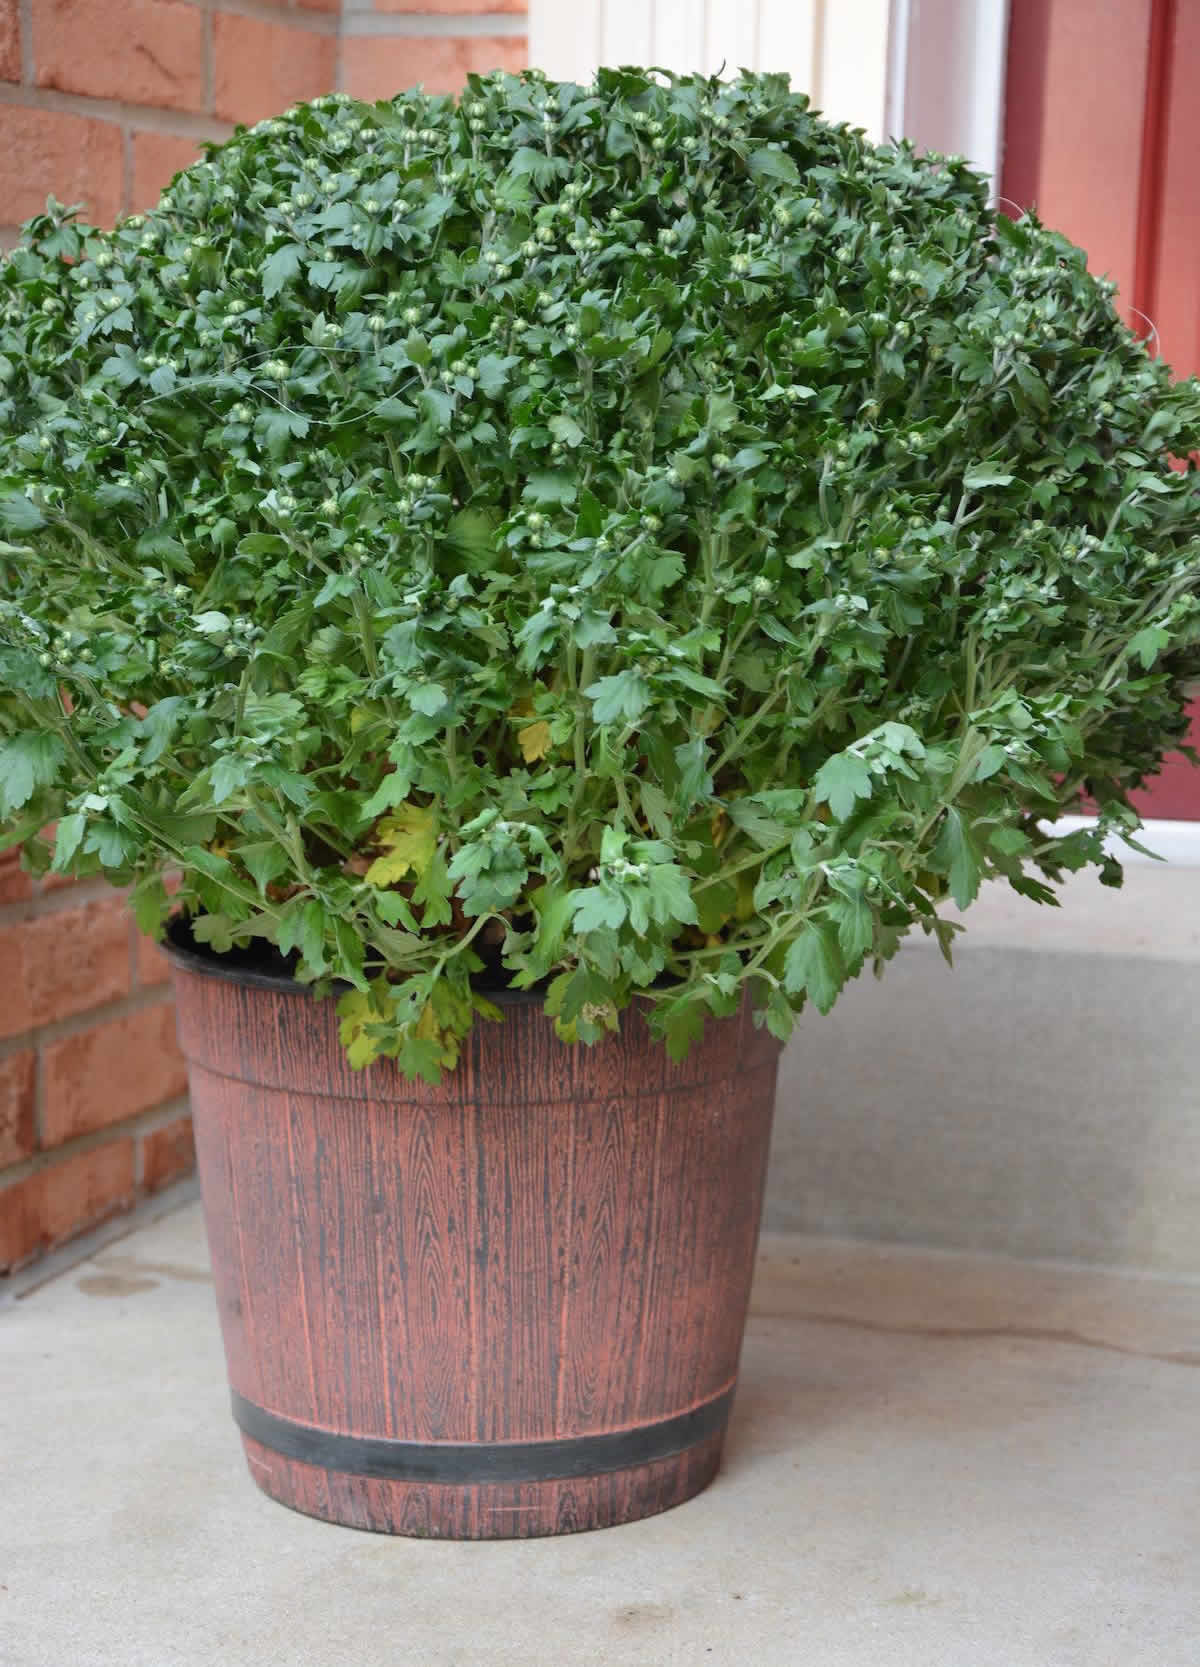