or Call Us at 1-800-776-2228
or Call Us at 1-800-776-2228
A damaged or missing rain gutter end cap can be annoying. Nobody wants to dodge a waterfall from a faulty gutter! Learn how to replace the end cap on a residential rain gutter in a few easy steps with the Arrow RHT300 Swivel Head Rivet Tool. Because most rain gutters feature decorative curves, installing rivets is often challenging. The unique swivel head of the RHT300 allows you to easily install the rivets along the curved edges of the end cap. Make sure your ladder is on sturdy ground and have a helper hold the ladder. Don’t forget to grab a pair of gloves and safety goggles (optional). State, local & municipal codes vary depending upon your location so please check before proceeding with your residential repair.
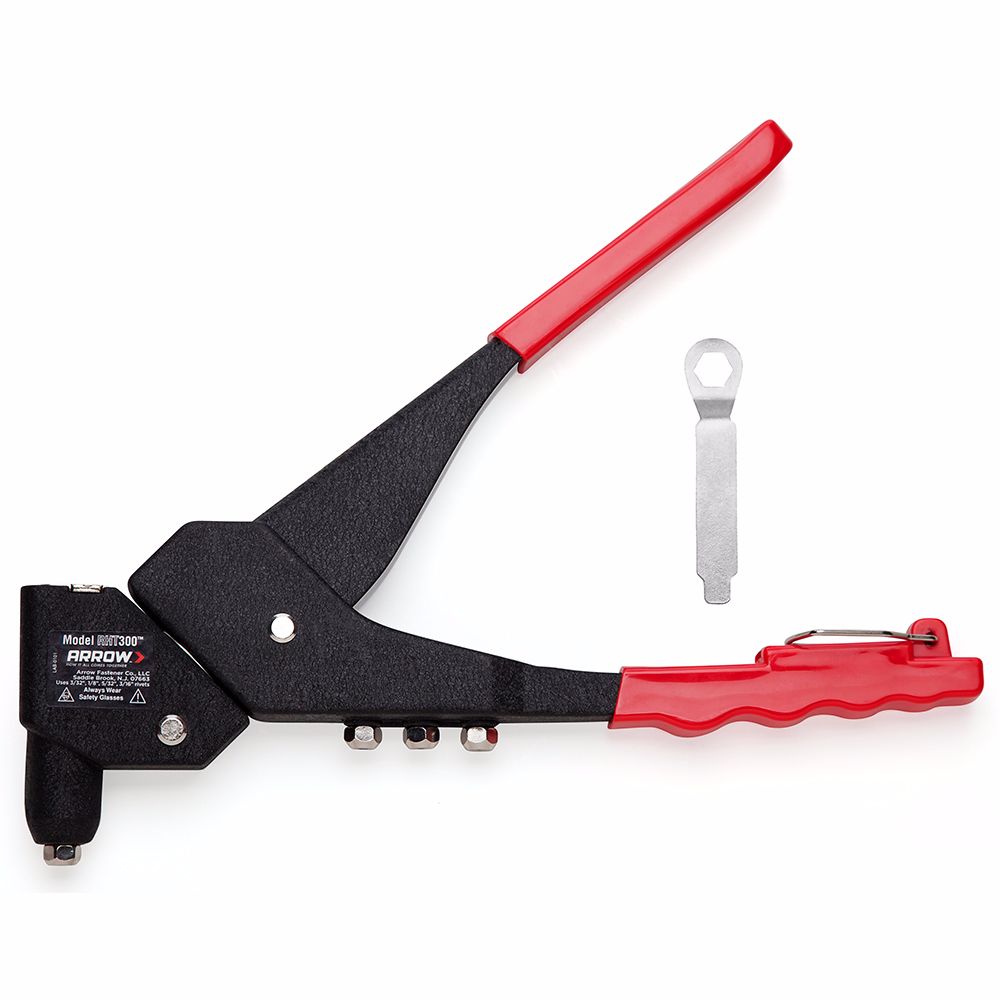
Swivel Head Rivet Tool
Your house may have features such as capping, drip edge or gutter cover. Our house had a gutter screen installed some years ago, so we gently moved that out of the way to access the end cap.
Your house may have features such as capping, drip edge or gutter cover. Our house had a gutter screen installed some years ago, so we gently moved that out of the way to access the end cap.
If the damaged gutter end cap is still in place, remove it carefully. Rain gutters are usually made from aluminum or vinyl. Damage to them can cause sharp edges, especially if the gutters are aluminum. Use the rubber mallet to gently tap the end cap if needed.
If the damaged gutter end cap is still in place, remove it carefully. Rain gutters are usually made from aluminum or vinyl. Damage to them can cause sharp edges, especially if the gutters are aluminum. Use the rubber mallet to gently tap the end cap if needed.
Use the needle nose pliers to repair any bends to the rain gutter. The gutter’s edge must be straight for the new end cap to be placed into position.
Use the needle nose pliers to repair any bends to the rain gutter. The gutter’s edge must be straight for the new end cap to be placed into position.
Place a bead of silicone sealant inside the cavity that runs along the bottom and sides of the replacement end cap.
Place a bead of silicone sealant inside the cavity that runs along the bottom and sides of the replacement end cap.
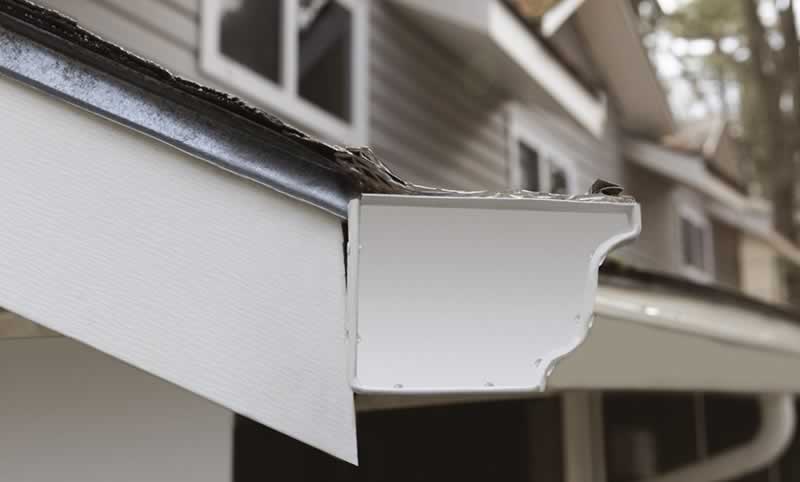
Snap the new end cap onto the rain gutter. Use the rubber mallet to gently tap in place as needed. Make sure the end cap is firmly in place on the end of the gutter. Then wipe off any excess silicone sealant that has leaked out around the outside of the cap. Additional sealant will be added on the inside later.
Snap the new end cap onto the rain gutter. Use the rubber mallet to gently tap in place as needed. Make sure the end cap is firmly in place on the end of the gutter. Then wipe off any excess silicone sealant that has leaked out around the outside of the cap. Additional sealant will be added on the inside later.
The lip of the end cap is fairly narrow, so we chose the smaller RSAW1/8IP rivets. This means we need to drill a 1/8” diameter pilot hole for the rivets. Drill the holes along both sides and the bottom of the end cap approximately 2” apart. Try to center the drilled hole on the lip of the end cap as much as possible due to its narrow width. Drill completely through the end cap lip and rain gutter.
The lip of the end cap is fairly narrow, so we chose the smaller RSAW1/8IP rivets. This means we need to drill a 1/8” diameter pilot hole for the rivets. Drill the holes along both sides and the bottom of the end cap approximately 2” apart. Try to center the drilled hole on the lip of the end cap as much as possible due to its narrow width. Drill completely through the end cap lip and rain gutter.
Next, secure the end cap using the Arrow RHT300 Swivel Head Rivet Tool. Find the rivet tool nose piece with the correct size hole to fit the rivet’s mandrel. Different rivets will feature a different diameter mandrel. Determine which nose piece to use by placing the mandrel in the hole. You want to use the nose piece that the mandrel fits into without too much play. If the correct nose piece is not installed on the rivet tool, use the supplied wrench to remove the current one and install the correct one.
Next, secure the end cap using the Arrow RHT300 Swivel Head Rivet Tool. Find the rivet tool nose piece with the correct size hole to fit the rivet’s mandrel. Different rivets will feature a different diameter mandrel. Determine which nose piece to use by placing the mandrel in the hole. You want to use the nose piece that the mandrel fits into without too much play. If the correct nose piece is not installed on the rivet tool, use the supplied wrench to remove the current one and install the correct one.
With the rivet tool’s handles fully open, place the thin part, or mandrel, of the Arrow RSAW1/8IP white rivet into the nose piece of the tool. Then insert the rivet into the pre-drilled hole and squeeze the handle several times until the mandrel snaps off the rivet. Rotate the convenient swivel head of the tool around the curved edges as needed to navigate the remaining holes.
With the rivet tool’s handles fully open, place the thin part, or mandrel, of the Arrow RSAW1/8IP white rivet into the nose piece of the tool. Then insert the rivet into the pre-drilled hole and squeeze the handle several times until the mandrel snaps off the rivet. Rotate the convenient swivel head of the tool around the curved edges as needed to navigate the remaining holes.
After all of the rivets have been secured, place a bead of silicone sealant along the inside of the gutter where the end cap meets the edge of the gutter. Do this along both sides and the bottom. Arrow Tip: A piece of plastic with a small section cut off one corner makes a great sealant smoother.
After all of the rivets have been secured, place a bead of silicone sealant along the inside of the gutter where the end cap meets the edge of the gutter. Do this along both sides and the bottom. Arrow Tip: A piece of plastic with a small section cut off one corner makes a great sealant smoother.
We tried to keep the end cap clean and looking new. However, we did get some scratches on the front and sides. We touched up those areas with some white spray paint and made our end cap look pristine!
We tried to keep the end cap clean and looking new. However, we did get some scratches on the front and sides. We touched up those areas with some white spray paint and made our end cap look pristine!
Reinstall the gutter cover or any added features that were removed in Step 1. Now enjoy not having to dodge the flood from your rain gutter!
Reinstall the gutter cover or any added features that were removed in Step 1. Now enjoy not having to dodge the flood from your rain gutter!
We’d love to see how your rain gutter end cap replacement project turned out! Share your project pictures on Facebook, Instagram or Twitter by using #MadeWithArrow or tagging Arrow Fastener.
Get Arrow tips, tricks, projects and promos in your inbox!
Hey there! We’ve updated our Privacy and Cookie Policies at the request of some of our friends in Europe. Click Accept to let us know you’re okay with the updates. Thanks!
View Cookie Policy Accept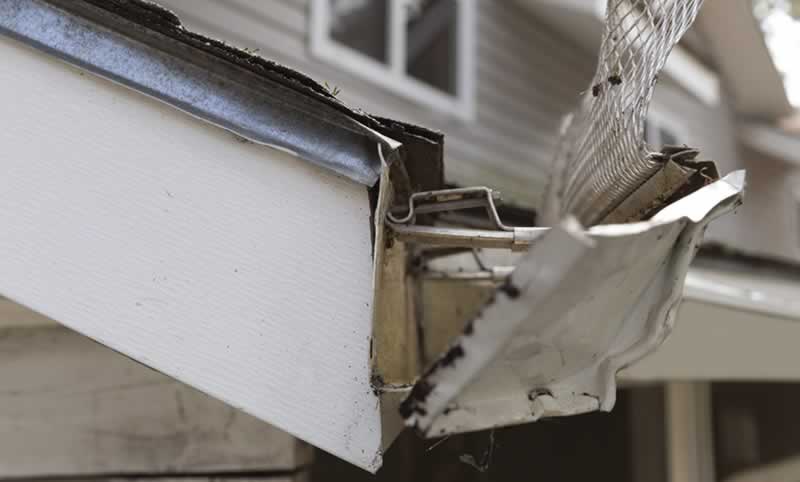