or Call Us at 1-800-776-2228
or Call Us at 1-800-776-2228
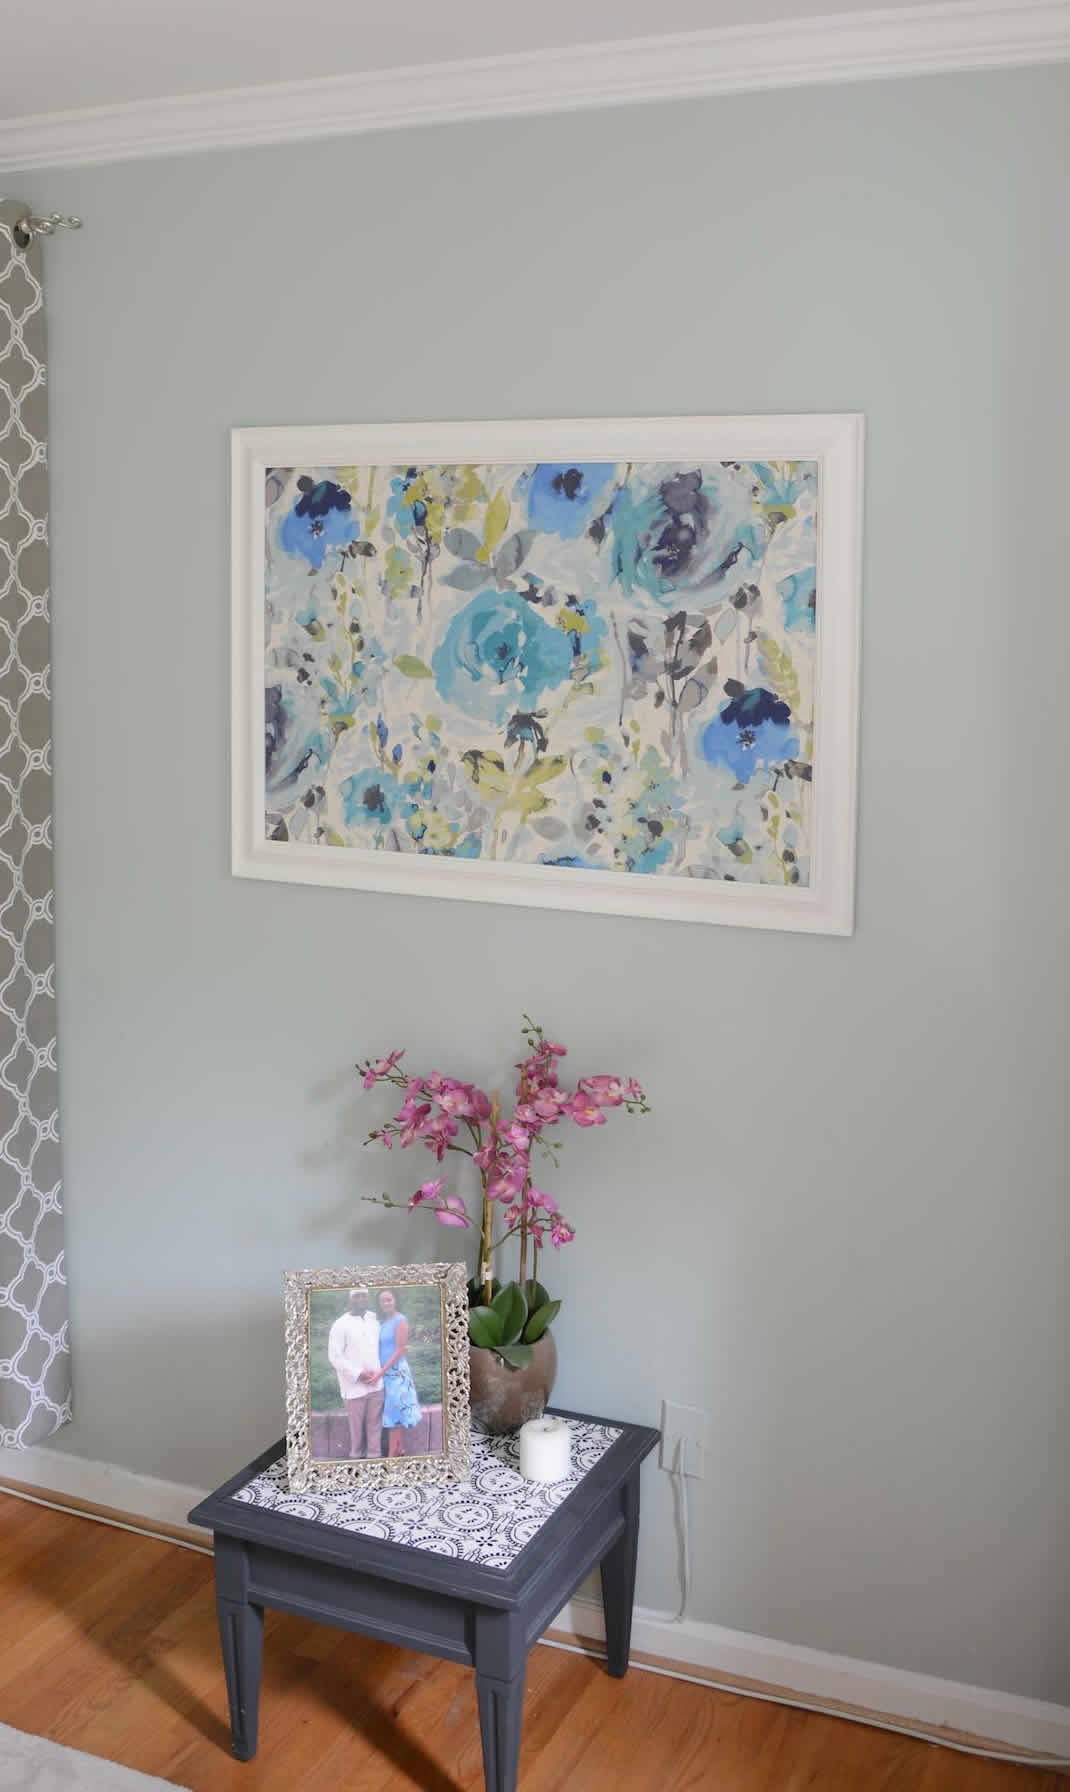
Have you ever found such gorgeous prints and wanted to make framed fabric wall art using a picture frame? That’s what happened when I found a beautiful floral linen fabric that reminded me of watercolor paintings. Stunning! There’s no other word to describe it.
So I did what any DIYer would do: I mounted the fabric on plywood with staples, popped the fabric back into a thrifted picture frame, and–voila!–framed fabric wall art!
I started this project with the intention of finding a large picture frame and creating a DIY message board. My first stop: my favorite thrift store! And like the “Thrift Store Gods” always do, they delivered to me exactly what I needed at the exact moment I needed it: This framed mirror with a coupon! For $7, it was a steal because you know how expensive frames can be, especially ones with mirrors! (FYI….Thrift stores are generally a good place for wood frames for fabric and other DIY wall art).
The next stop was the fabric store. I was on the hunt for fabric and cork to glue to a DIY message board. The moment I walked in, my eye caught this gorgeous fabric which had just been added to the fabric stock that day!
I “oohed” and “ahhhed” over it to the saleswoman until I saw the price at $49.99 per yard. YIKES! So I shuffled along to find something more in line with my cheap budget. But I couldn’t get my mind off that stunningly beautiful fabric. The saleswoman could sense my eagerness and I kept hovering nearby, fingering the fabric and sighing in disappointment over its price.
She was nice enough to lend me 15% off, and while that wasn’t much, it was just the push I needed to buy one glorious yard, with which I had no idea what I was going to do. I’d come up with some idea later, right after I finished my message board…
I have this intuition with DIY… Some call it creativity, but I like to think of it as intuition. Sometimes a project just feels right. (Does that ever happen to you?)
As much as I loved the idea of organizing my family for the impending school year with a DIY message board, I couldn’t shake the idea of doing framed fabric wall art and prominently displaying it where I could admire and enjoy it daily. I didn’t want to stick push pins through it. It was way too expensive (and pretty) for that.
So I decided it deserved a place a place on my master bedroom wall!
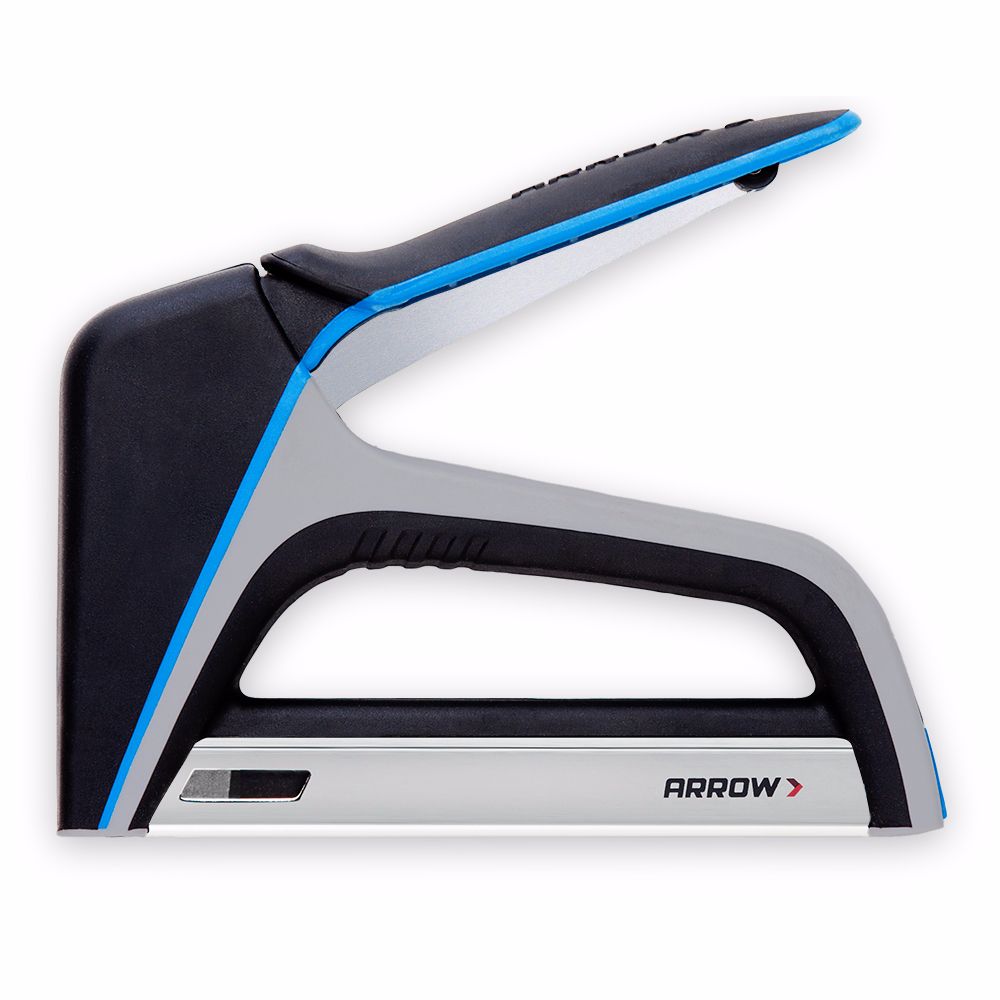
TacMate™ Heavy-Duty Staple Gun
Yank out the old glass or mirror from the frame. This frame had some yucky adhesive holding the mirror in place, but because it was so hot outside at the time, it softened enough for me to easily lift the mirror out. It was still a pain to scrape away all the leftover adhesive on the frame!
Yank out the old glass or mirror from the frame. This frame had some yucky adhesive holding the mirror in place, but because it was so hot outside at the time, it softened enough for me to easily lift the mirror out. It was still a pain to scrape away all the leftover adhesive on the frame!
Clean and paint the picture frame. Don’t you love how easy it is to paint stuff now compared to years ago? No sanding, no priming (as long as the piece is in good condition). This frame, while dirty, was in good condition. With a little bit of wiping down after removing all the adhesive, it was ready for a quick coat of bright white paint to freshen it up!
Clean and paint the picture frame. Don’t you love how easy it is to paint stuff now compared to years ago? No sanding, no priming (as long as the piece is in good condition). This frame, while dirty, was in good condition. With a little bit of wiping down after removing all the adhesive, it was ready for a quick coat of bright white paint to freshen it up!
Measure the length and width of the plywood. 1/4″ thick plywood is perfect for mounting inside of picture frames to create framed fabric wall art because it’s sturdy, yet thin enough to still hold inside of the frame with a thin layer of fabric on it. It doesn’t create a lot of bulk.
I popped the 2″x4″ sized plywood inside of the frame as best as I could, then marked how much I would need to trim away.
You could use a measuring tape, but for me, just laying the plywood on the frame and marking where to trim was most helpful.
(Or it could be that I’m just lazy. HA!)
Cut the plywood to fit the picture frame. The jigsaw is one of my favorite tools because it’s so easy to use! Once I marked the measurements on the plywood, I used my jigsaw to cut it. After cutting the plywood to size, I checked the fit and–BOOM!–perfect fit and no “do overs.” Don’t you love when DIY is easy?
Cut the plywood to fit the picture frame. The jigsaw is one of my favorite tools because it’s so easy to use! Once I marked the measurements on the plywood, I used my jigsaw to cut it. After cutting the plywood to size, I checked the fit and–BOOM!–perfect fit and no “do overs.” Don’t you love when DIY is easy?
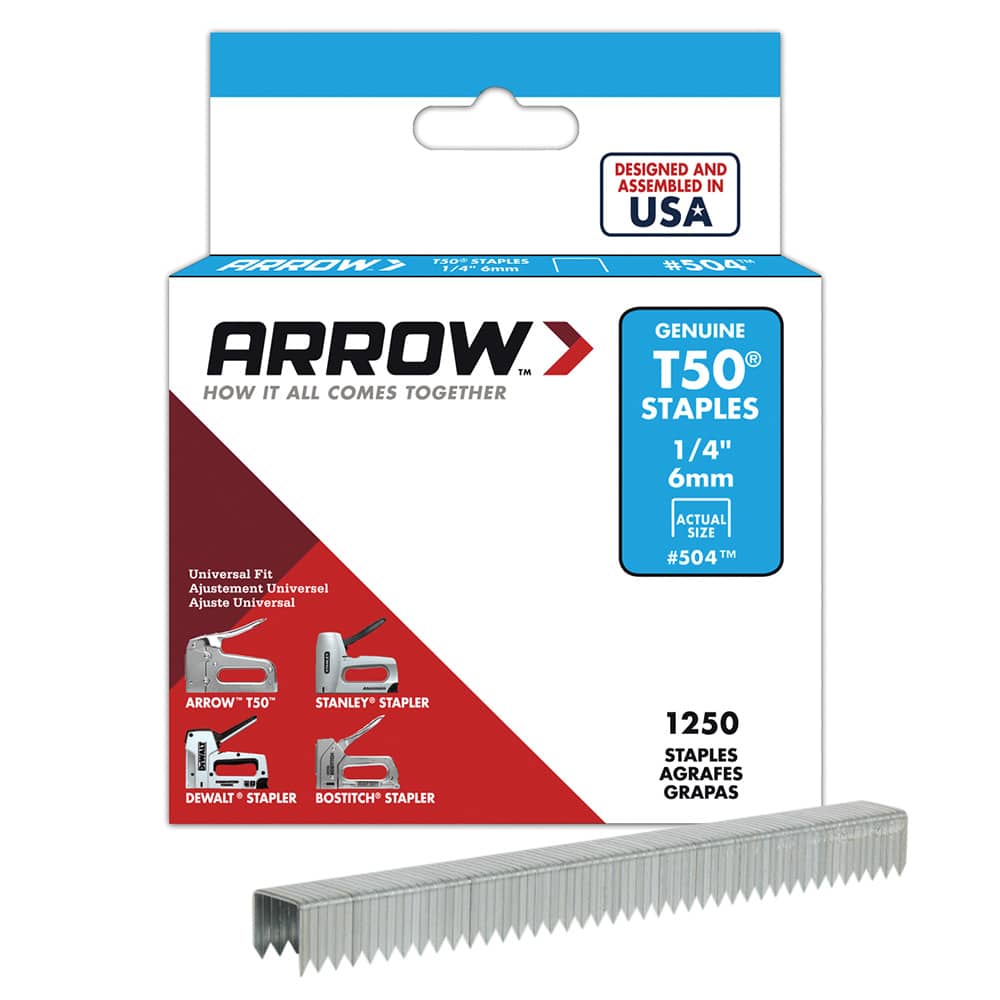
Staple the fabric to the plywood. The T50X TacMate™ Heavy Duty Staple Gun is perfect for this project. Since the wood was only 1/4″ thick, I used the #504™ staples (1/4”), which barely went through to the other side. With the fabric right-side down, I laid the plywood over the fabric and then turned the sides up and over the edges of the plywood. Starting with one edge, I stapled the fabric into place, securing it with staples every 3″ or so.
The key to doing this right is to make sure you start on one side, then pull the fabric tight on the opposite side while stapling. For example, I started on the RIGHT side. Once the right side was stapled, I pulled the LEFT side taut and began stapling, pulling snugly as I stapled along. I made sure not to pull too tight to prevent warping the fabric. After the LEFT side was done, I pulled the TOP taut and stapled. I checked the fabric regularly to make sure that the fabric pattern was straight, not warped or crooked. Lastly, I pulled the BOTTOM side taut and stapled. When I got to the corners, I folded them in slightly before stapling so that they didn’t add bulk around the edges.
Once I was done, I turned over my new framed fabric wall art and made sure the fabric was lying FLAT against the plywood without any wrinkling or sagginess.
TIP: If there’s saggy fabric, use Arrow’s SL24D™ Staple Lifter to remove the staples, and try stapling and pulling again.
Mount the fabric board into the picture frame. If you used a frame like mine, with the little metal prongs, you’ll be able to simply fold them down, holding the covered plywood into place (as long as your fabric isn’t too bulky).
Mount the fabric board into the picture frame. If you used a frame like mine, with the little metal prongs, you’ll be able to simply fold them down, holding the covered plywood into place (as long as your fabric isn’t too bulky).
Although the fabric was pricey, a picture frame with fabric inside is still affordable when you think about how much DIY wall art costs when you buy it at a store! The plywood was perfect to adhere the fabric so inside of the frame.
The best part about fabric framed prints is that with the seasonal changes, you can easily pop out the plywood, loosen and remove the staples and add new fabric to the wood frame without having to buy new wall art. (Plus, since we’re not gluing it down, we’re not ruining the fabric, which was can later use for pillows or some other home decor project).
Isn’t it to die for?
Get Arrow tips, tricks, projects and promos in your inbox!
Hey there! We’ve updated our Privacy and Cookie Policies at the request of some of our friends in Europe. Click Accept to let us know you’re okay with the updates. Thanks!
View Cookie Policy Accept