or Call Us at 1-800-776-2228
or Call Us at 1-800-776-2228
In this project, I’ll show you how to build a DIY concrete and steel outdoor end table. This design could be scaled to be a coffee table, side table, and more. The tools needed for this kind of build are relatively simple, and you could certainly make a wooden base if you don't have a welder. The tooling required for this kind of project isn't super crazy. You can adjust this build to fit the tools you have available very easily.

Pneumatic Brad Nailer
Dual Temperature Glue Gun
Cut the concrete for pieces to size. For the form, I used melamine, which is a great choice since the concrete won’t stick to it. I ripped a 2-1⁄2″ wide strip from one edge of the 2′ x 4′ piece of melamine on the table saw. This strip will form the sides of the form.
Next, I set my table saw blade to 60 degrees and cut roughly 7″ long pieces to make up the sides of the form. Since I was going for a hexagonal shape, I cut six total side pieces at identical lengths.
With all of the side pieces cut, I temporarily connected them with a strap clamp and then used Arrow’s PT18G™ Pneumatic Brad Nailer to attach the pieces to each other. You want whatever method you use to attach the pieces to be fairly easy to separate, which is why brad nailers were a great choice.
After getting the hexagon-shaped sides connected, I used Arrow’s TR400DT™ Dual Temperature Glue Gun to attach the sides to the base.
With the form created, I added silicone caulk to all of the inside edges of the form and then used a caulk tool to smooth out the caulk. Doing this will create beveled edges on the surface of the concrete, giving it a cleaner look and removing any sharp sections. You can also add painter’s tape to catch any excess caulk.
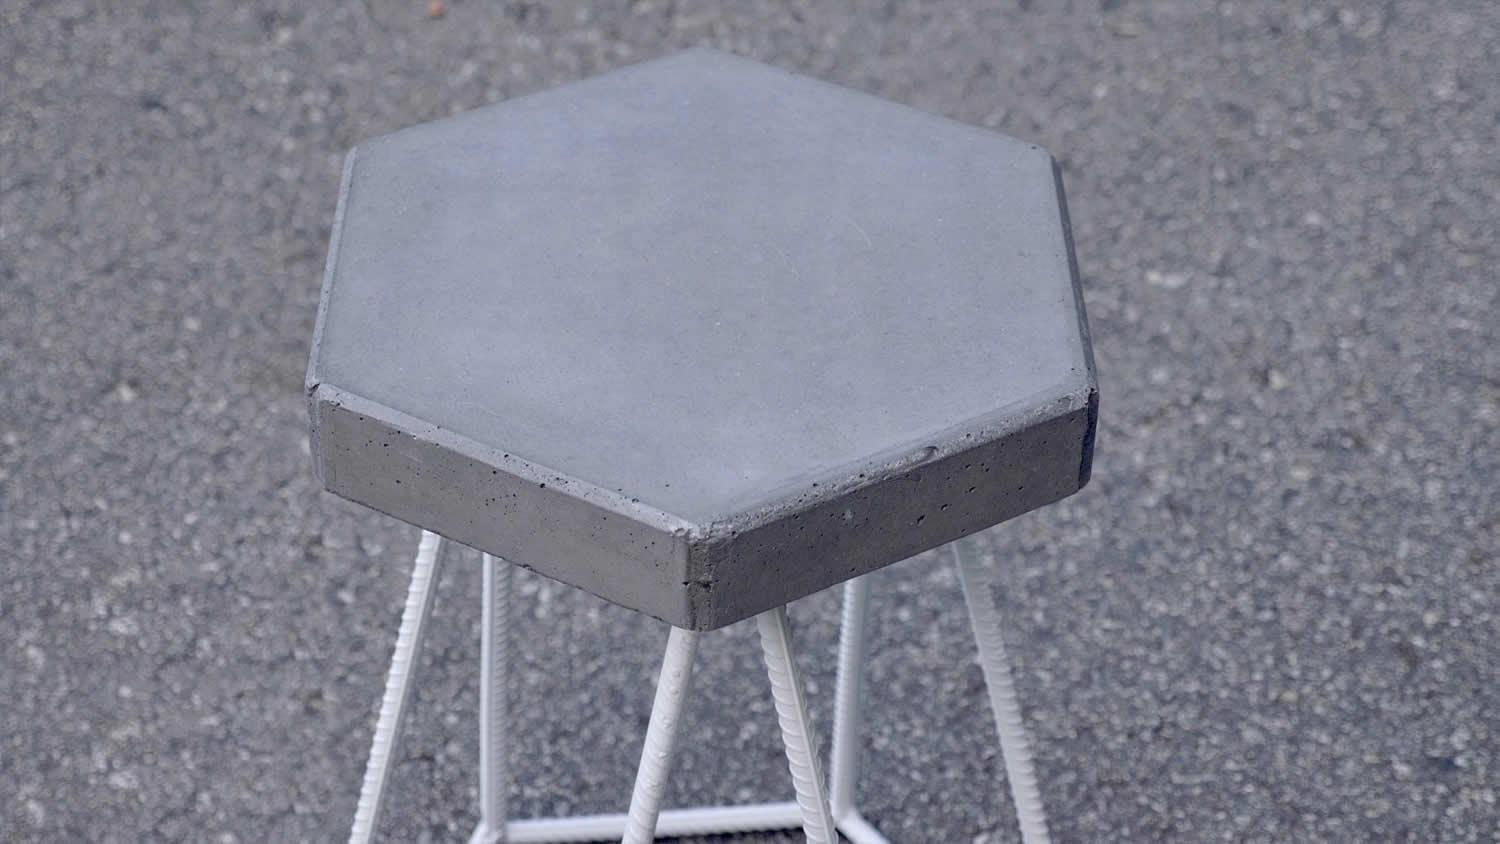
Next, mix and pour the concrete. For this project, I used an 80-lb. bag of concrete. I needed less than half the bag to create this table top. I added a liquid cement color to my water before mixing it in with the concrete, as I wanted a darker color to my table top.
When adding the water, it’s best to take it slow and add it in small increments. It’s very easy to overdo and end up with watery concrete. You want the final texture to be similar to a thick oatmeal.
After mixing thoroughly, I added the concrete to the form in two layers, vibrating the first layer with a reciprocating saw with the blade removed to remove the air bubbles. After getting out as many bubbles as I could, I added another layer of concrete, totally filling the form, and used a straight piece of wood to screed, or level out, the surface. I finished it off by vibrating the form again to remove the last of the air bubbles.
I let the concrete cure in the form for 48 hours before removing it. After removing it, I gave it another few days to cure before moving on to sanding.
The surface of the table looked great right out of the form, but some of the edges weren’t perfect due to my sloppy silicone work. I used a file and some 120 grit sandpaper to smooth this out.
Once the edges were smooth, I removed the dust and then applied two coats of a concrete sealer.
Cut the metal base pieces to length and weld the base hexagon. I used standard 1⁄2″ rebar for this project, which I picked up from my local home center. If I had planned better, I could have bought the pieces in pre-cut lengths and avoided the cutting. I cut six pieces to form another hexagon, just like the top, and then added a bevel to the ends of the pieces using a belt grinder.
I used a welder to attach the pieces to each other, first tacking them in place and then coming back and filling in the welds with more weld material.
Cut the base sides and top, weld, and grind. The shape I chose for the top part of the base was a triangle, as it fit within the shape of the hexagonal concrete top well. If I had thought ahead, I could have made this base and just put it directly in the concrete form while pouring the concrete, but I didn’t think of that idea for some reason.
To connect the top and bottom of the base, I used a few more pieces of rebar and formed long triangular sections to span the area between these sections. I welded them in place, and then reinforced all of the welds before grinding the welds smooth using an angle grinder.
Paint the base and attach it to the concrete top. I applied a few coats of a rust-inhibiting primer to the base, then added a few coats of white enamel paint.
After letting the paint dry overnight, I attached the base to the top using 1⁄2″ conduit straps and masonry screws. Make sure to pre-drill the holes using a specialized masonry bit and make sure your drill is on hammer mode.
With the base attached, the table is finished!
Hopefully you enjoyed this project! This was my first time working with concrete and I'm really happy with the way it turned out. I also think the rebar adds a nice texture to the base while the white paint gives it a clean, modern look.
Get Arrow tips, tricks, projects and promos in your inbox!
Hey there! We’ve updated our Privacy and Cookie Policies at the request of some of our friends in Europe. Click Accept to let us know you’re okay with the updates. Thanks!
View Cookie Policy Accept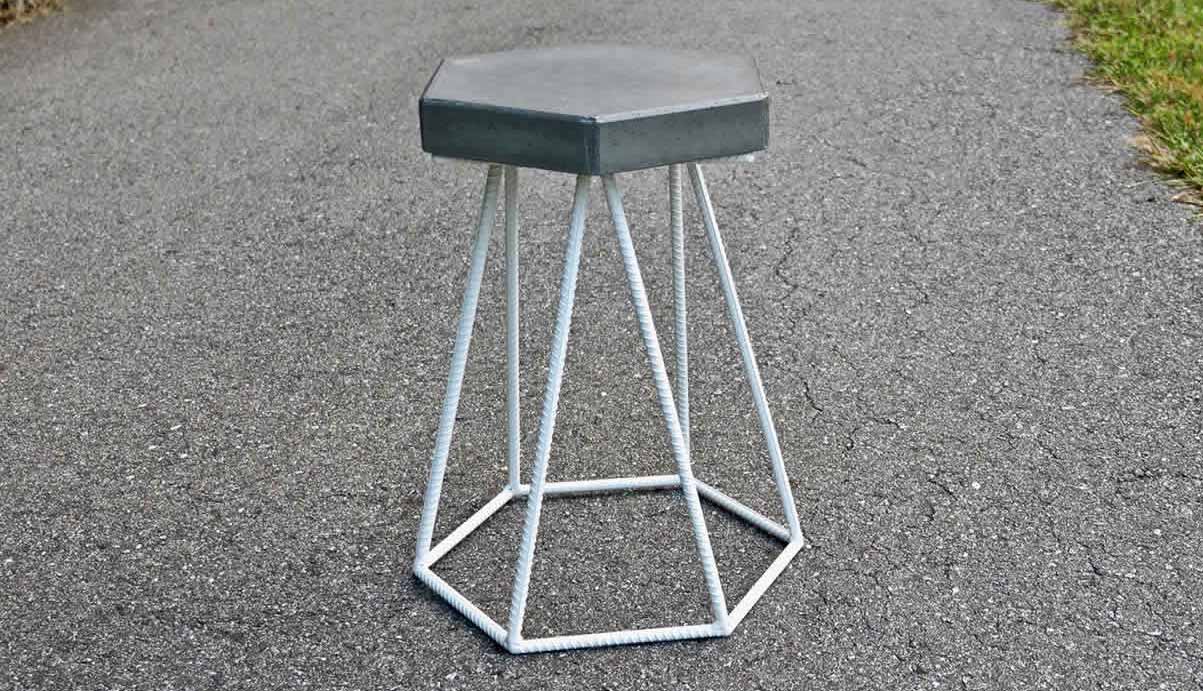