or Call Us at 1-800-776-2228
or Call Us at 1-800-776-2228
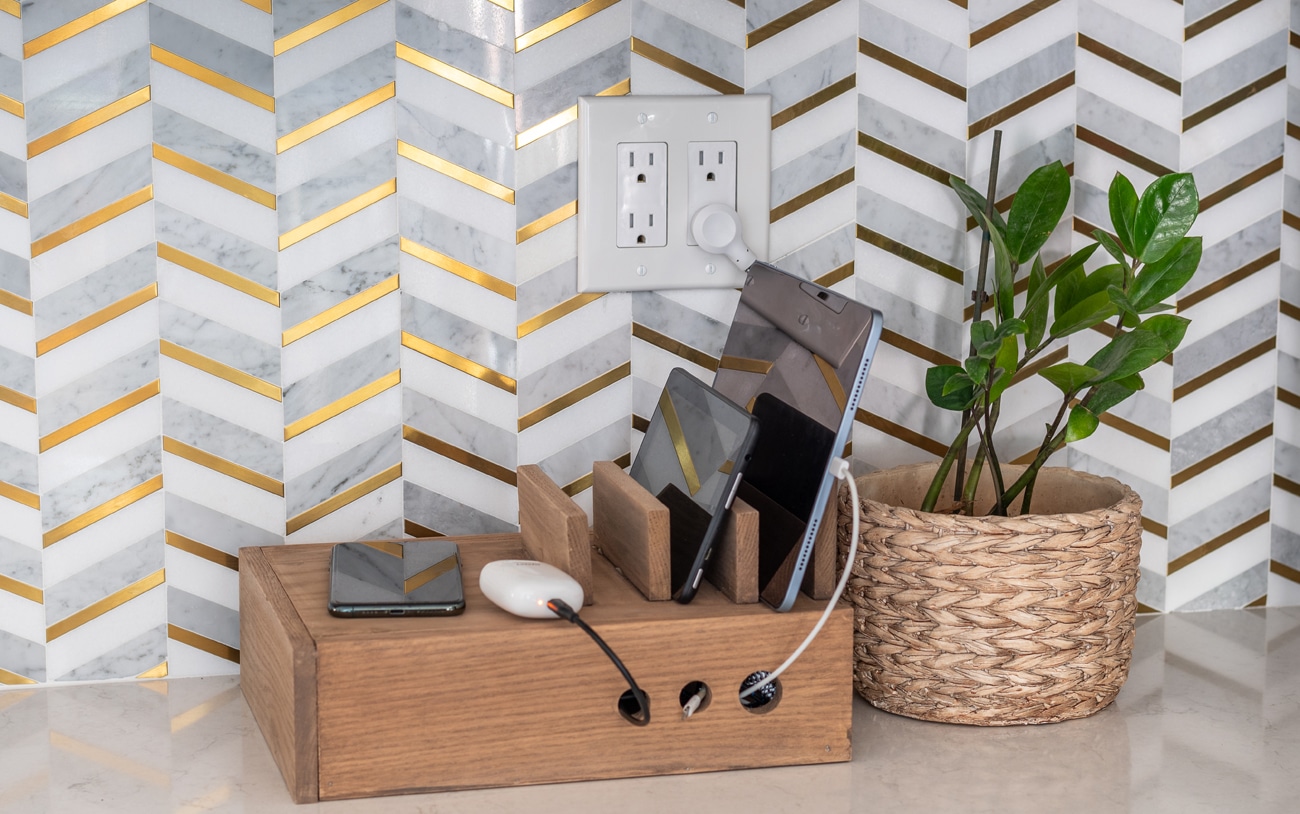
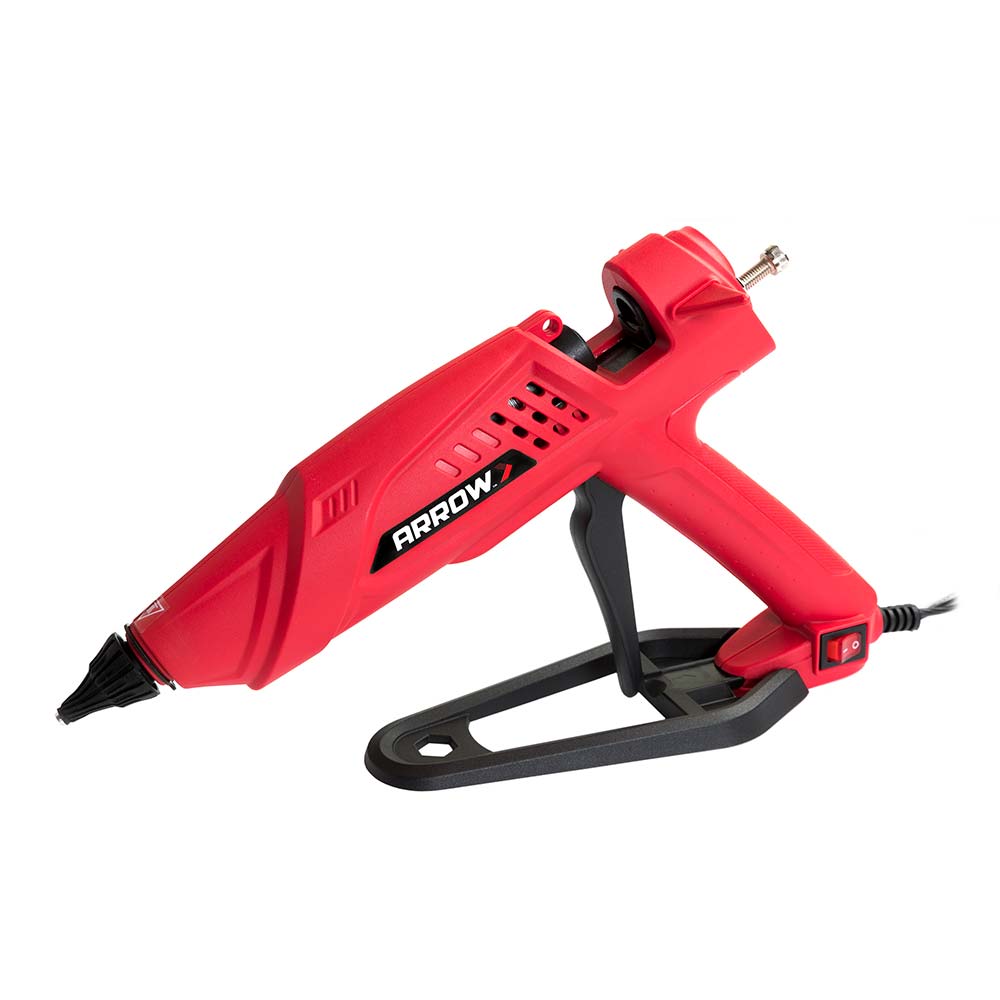
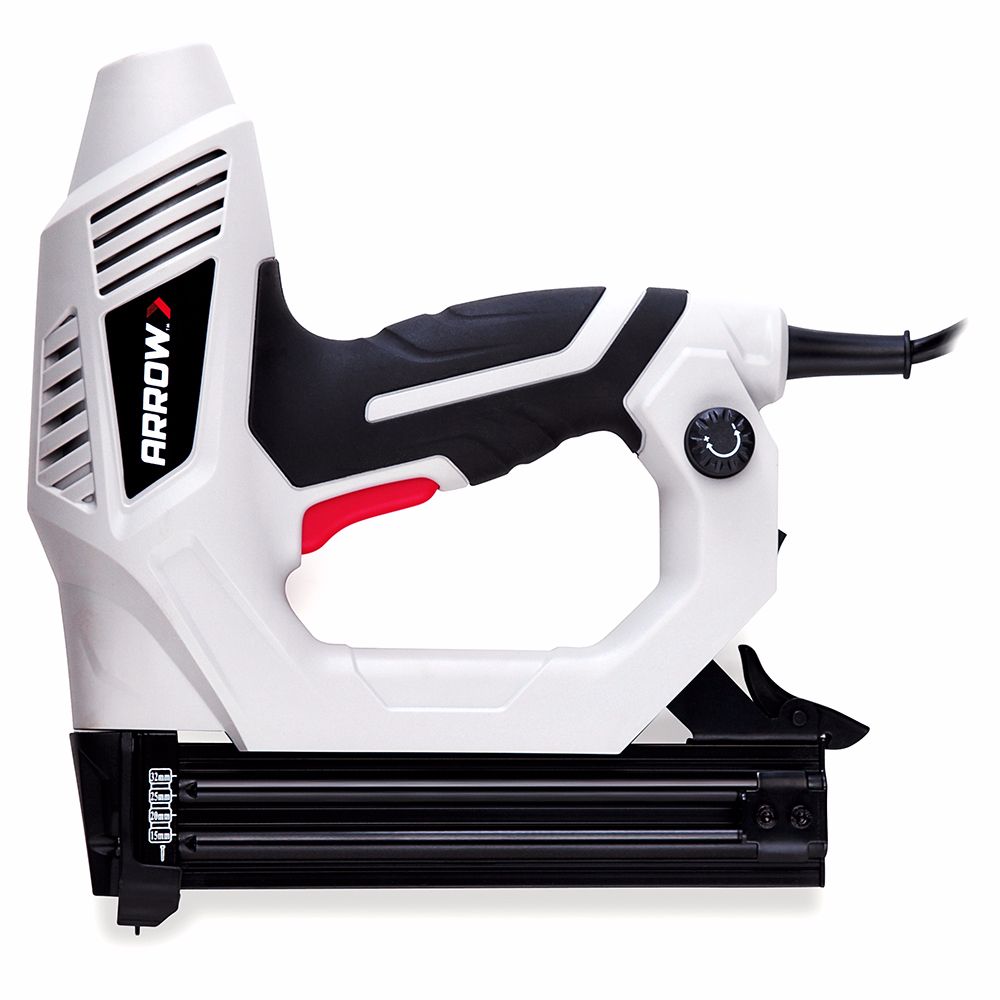
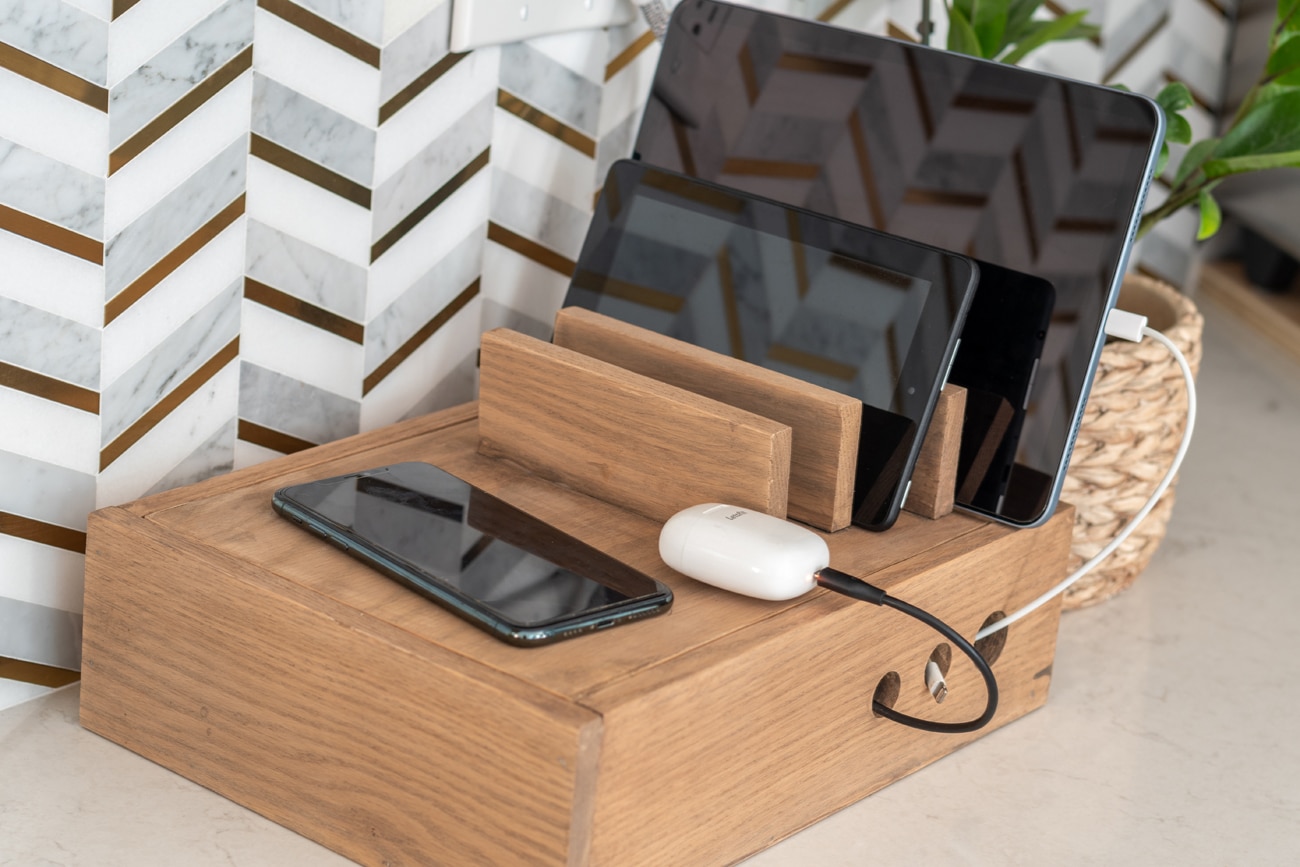
If "has anyone seen my charger?" is a frequently asked question in your household, then you’ve come to the right place! This DIY charging station is a convenient way to organize and keep track of all those unsightly wires and cords. We customized our station with a wireless charger and slots for two phones and one tablet. Grab your Arrow GT300 professional high-temp glue gun and ET200BN professional electric nailer to create your own!
Professional High-Temp Glue Gun
Professional Electric Nailer
Start this project by using a miter saw or circular saw to cut your lumber to the following:
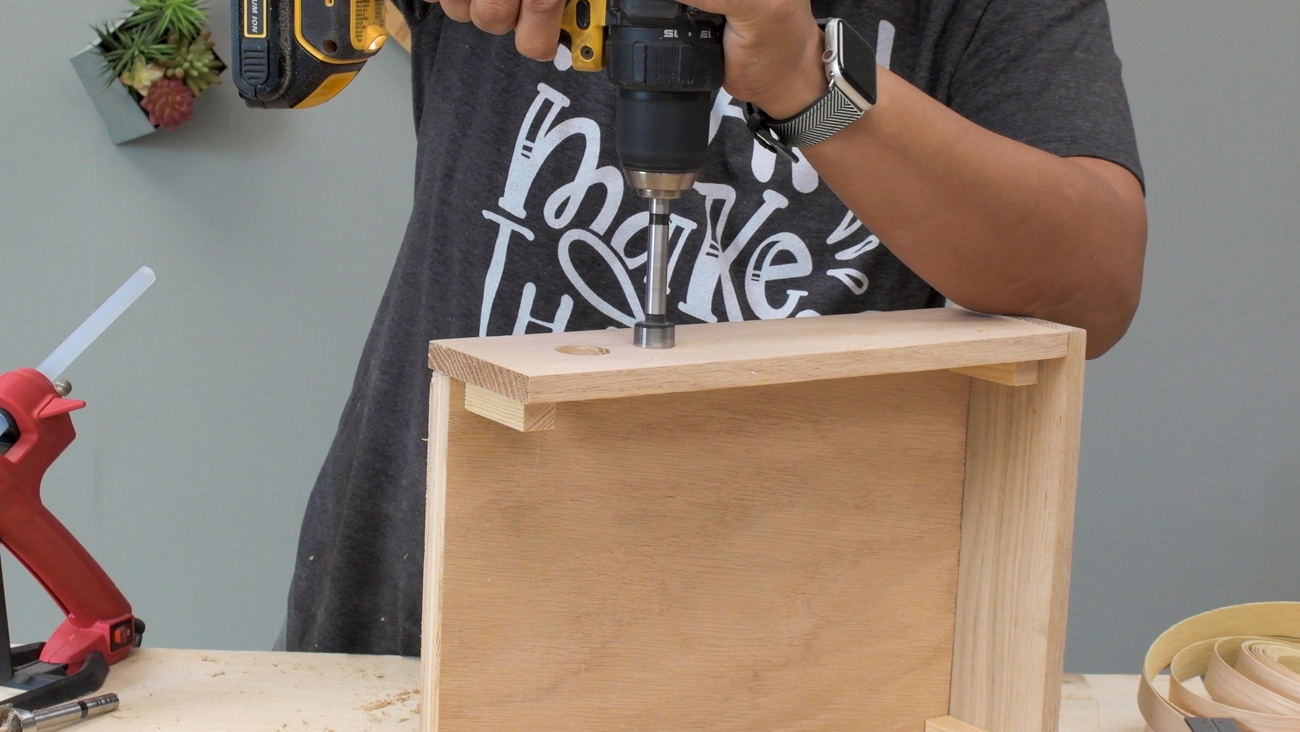
Next, choose one of the long side pieces as your front. On this piece, use the Forstner bit to make three holes for your charging cords to pull through. You will want to make your first hole at least 2″ away from the edge, and then the next two holes ½” apart.
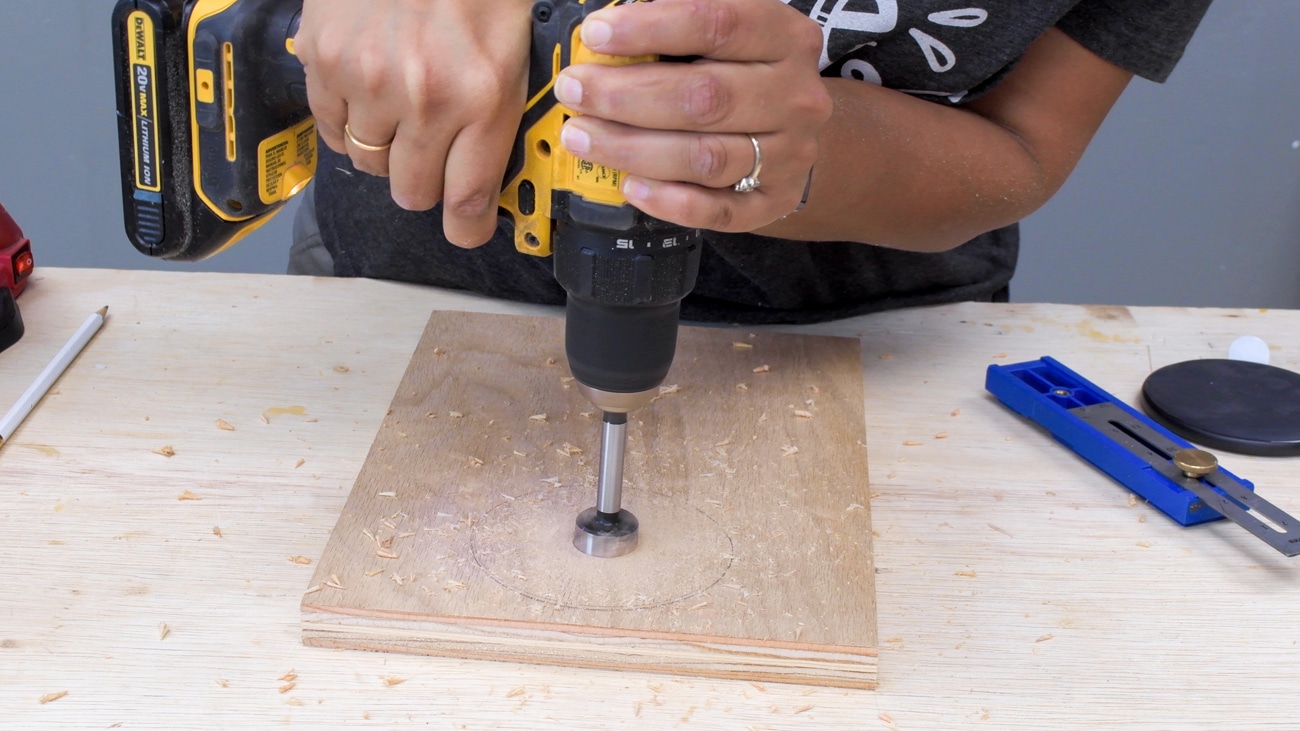
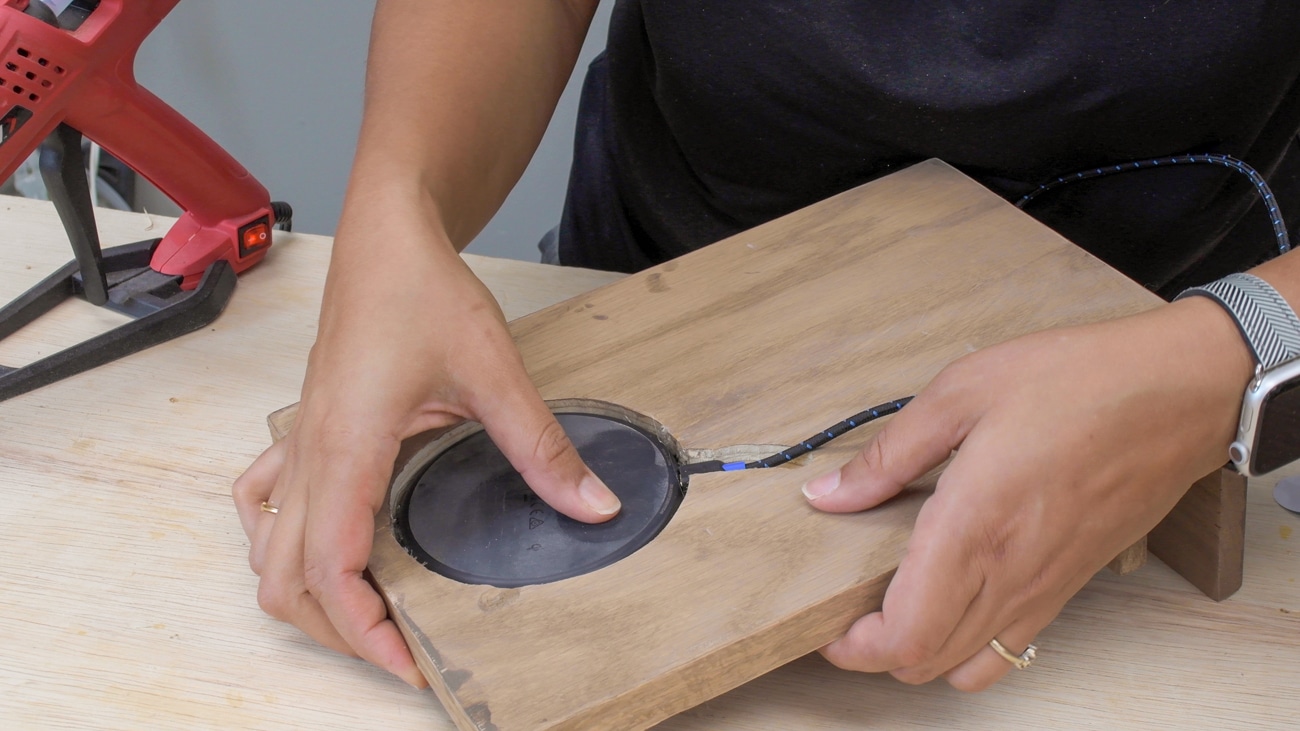
Next, make the inset for your wireless charger. Measure and mark its exact location on the bottom of the lid, then make a starter hole with the Forstner bit, being careful not to go all the way through the plywood.
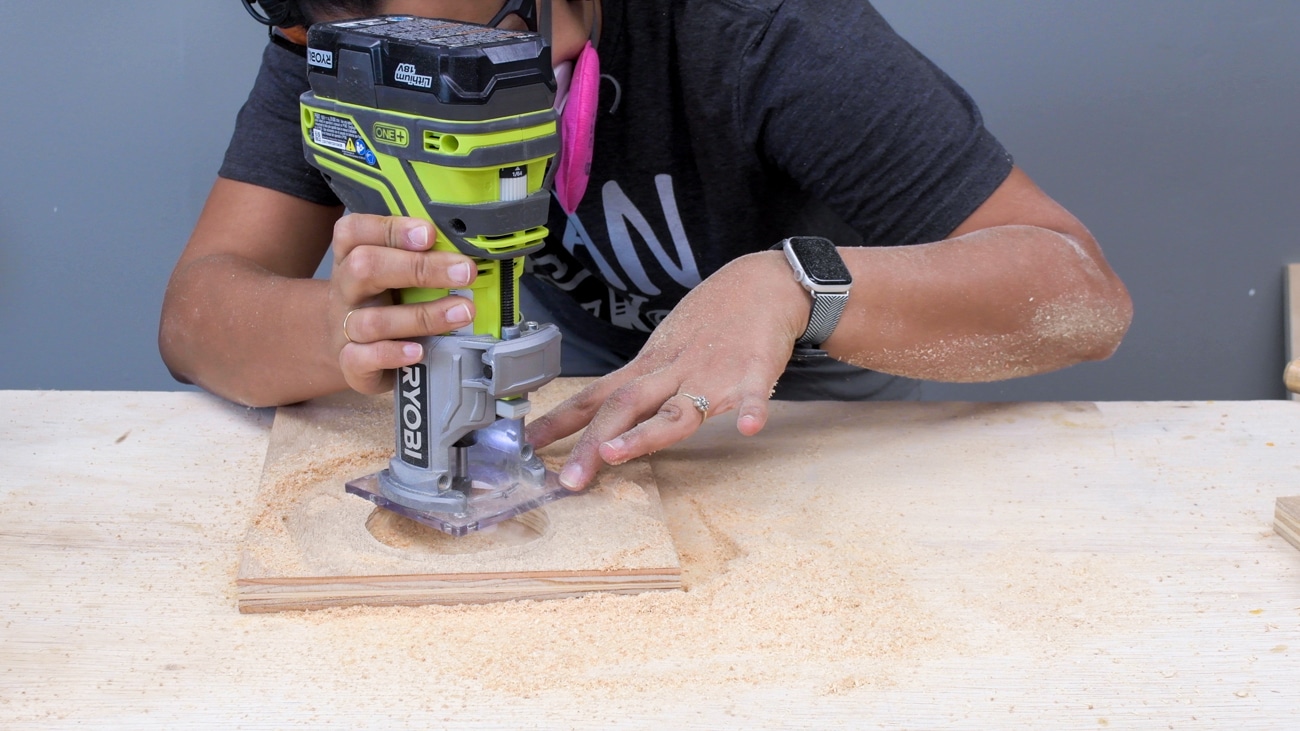
Then you will want to set up the straight router bit so that it is at least ⅛” less than the thickness of your plywood and route out the circle for your wireless charger to sit in. You’ll want the plywood between the wireless charger and the phone to be as thin as possible (without compromising the integrity of the plywood) for it to work efficiently.
You may also need to route a little groove on the side of the box to accommodate the connector.
Make sure you test the charger through the plywood to see if it works!
Now you can sand each piece of the charging box, and if you would like to stain your wood pieces before assembling, you can do that too. To assemble the charging station, attach the three sides to the plywood lid using your Arrow GT300 professional high-temp glue gun to hold the pieces in place, and your Arrow ET200BN professional electric nailer to secure them. The three holes on the long side piece should be opposite to where the space is routed for the wireless charger under the lid.
Next, it’s time to add lid supports. Using your Arrow GT300 glue gun, attach the square dowels to each of the four corners of the lid. These will help hold the lid up when the box is closed.
Now it’s time to add the slots on top of the box. First, add the tablet support flush to the edge of the lid. Next, place the three phone supports an inch and a half away from each other. Make sure they are centered and straight. Use your Arrow GT300 glue gun to glue them in place, and if you need added support, you can use your ET200BN electric nailer to add nails from the underside.
If you haven’t stained the wood yet, now is the time to do so.
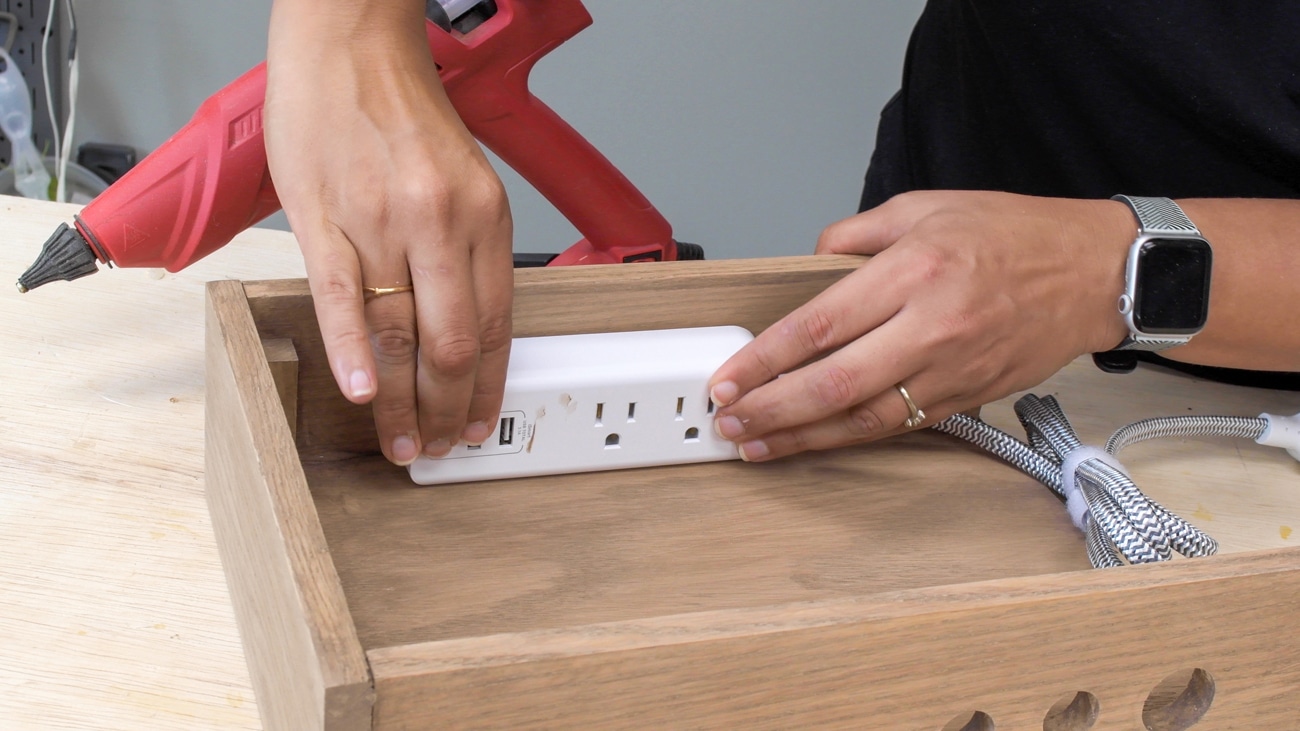
Finally, install the cords and wireless charger inside of the wooden charging station. Add the power strip and wireless charger inside of the box using hot glue. Use as little hot glue as possible to hold the wireless charger in place. If there is too much hot glue, it will reduce the charger’s efficiency.
Now you’re all set to power up your DIY charging station! In addition to your paint or stain, you can add fun details like a lightning bolt decal to identify where the wireless charger is located.
We’d love to see how your DIY device charging station turned out! Share your work with us on Facebook and Instagram by tagging @ArrowFastener or using #MadeWithArrow.
Get Arrow tips, tricks, projects and promos in your inbox!
Hey there! We’ve updated our Privacy and Cookie Policies at the request of some of our friends in Europe. Click Accept to let us know you’re okay with the updates. Thanks!
View Cookie Policy Accept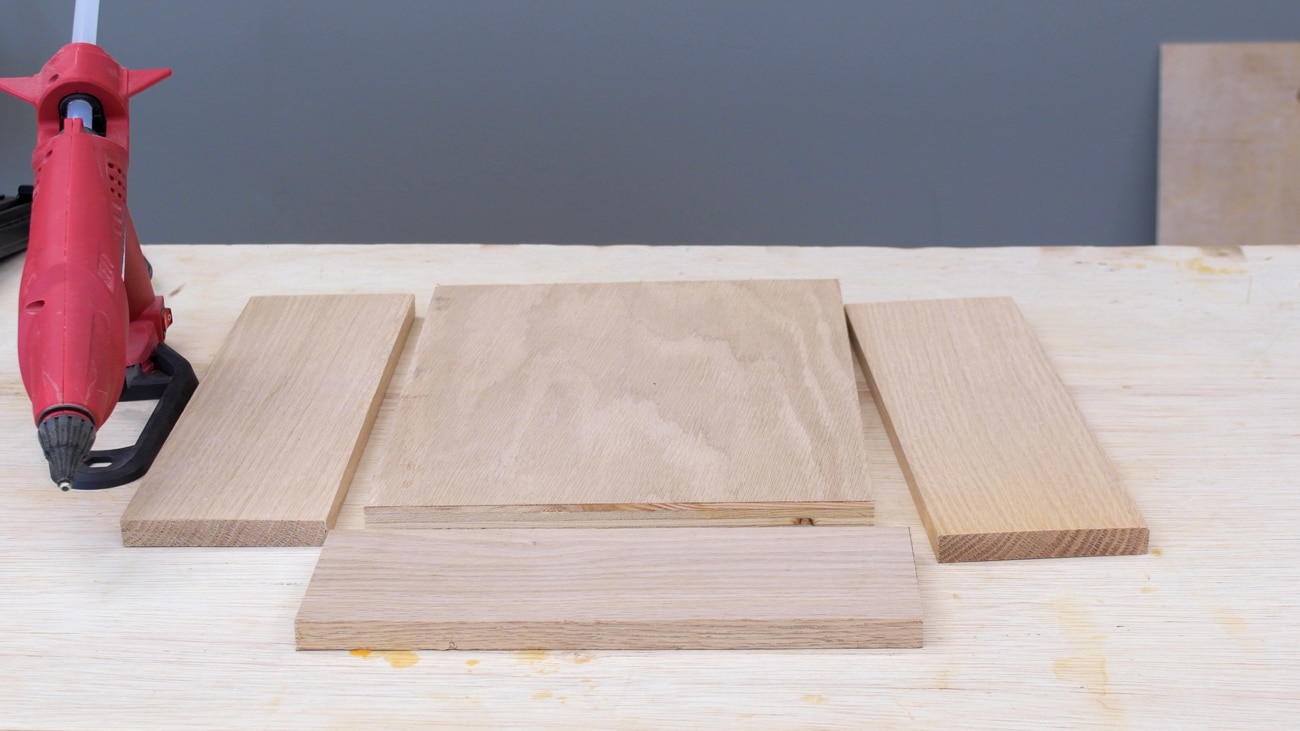